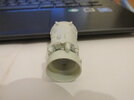
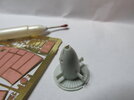
The cylinder is just made from an offcut of sprue. As you say. It's the little details but i'll know they are thereit’s the little extras that make a build your own……
You are using an out of date browser. It may not display this or other websites correctly.
You should upgrade or use an alternative browser.
You should upgrade or use an alternative browser.
1/32 Me262A-1a/U4 (JV44 Hunters and Protectors Project)
- Thread starter AlanG
- Start date
scottie3158
SMF Supporter
Alan. Will follow with interest.
Nice! Looking forward to this one Al.
Will be a slight delay with posting more pics on here. My laptop went bang last weekend and i now have a Chromebook to replace it. Problem is that it doesn't accept my camera SD card (too big). So i am awaiting an USB converter so i can post updates.
- Joined
- Sep 4, 2019
- Messages
- 9,501
- Points
- 113
- First Name
- Andrew
Sorry to hear that Al.Will be a slight delay with posting more pics on here. My laptop went bang last weekend and i now have a Chromebook to replace it. Problem is that it doesn't accept my camera SD card (too big). So i am awaiting an USB converter so i can post updates.
Sorry to hear that Al.
It just means a load of update photos to post when i get it. Been doing some more scratch building in the cockpit. Haven't even got to the proposed engine and undercarriage bay scratch builds yet lol
Looking forward to the updates Alan. I don’t know what ports the chrome book has, but could you upload pictures to your chrome book using a USB cable?
My digi camera is quite old and doesn't have those new fangled things lolI don’t know what ports the chrome book has, but could you upload pictures to your chrome book using a USB cable?
Oh well, worth a shout……and no matter what reader you get someone will make the memory card smaller and more awkward so you have to get yet another one…..
I liked compact flash, which my last camera took. They were tough and well made, and large enough to be handled with cold hands….then they moved to SD cards, which my current camera takes….small, flimsy, and not particularly easy to handle……now they’ve gone to micro SD….sneeze and you’ll never see it again……
I liked compact flash, which my last camera took. They were tough and well made, and large enough to be handled with cold hands….then they moved to SD cards, which my current camera takes….small, flimsy, and not particularly easy to handle……now they’ve gone to micro SD….sneeze and you’ll never see it again……
Andy the Sheep
SMF Supporter
Alan, sorry I lost the start of this build.
A very nice subject in an uncommon version. I'll follow your progresses with interest.
I bet pilots hate it, flying and landing with such a nose weight had to be a continuous pushing and pulling on stick, throttle and rudder with a soundtrack of prayers and swearings and I cannot imagine what happened every time the pilot pushed on the fire button.
Andrea
OK got a SD card reader now. So i can post a few pics. I was hoping to have more of it done this week but with the weather, the farm has been super busy.
So here is roughly where i'm at with it. There are a few other bits slightly done but i'll take pics of them later.
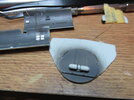
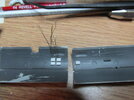
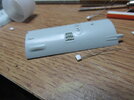
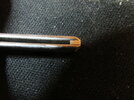
After looking at some pics of the wiring behind the cockpit instrument panel, i saw that there were a few terminal boxes located on the cockpit side walls. I know the wiring is visible from above, through the canopy glass but i'm not sure if where they go to is. So i decided to have a little scratch build session and build the boxes. All wire holes were drilled with a 0.3mm bit. The accumulator on the forward bulkhead probably isn't visible but i put it there because the pipework from the instrument panel goes there. The cylinder was made from sanding some of the sprue and the clamps were made by flattening 0.2mm lead wire.


Jim R
SMF Supporter
Sorry about the old computer but glad the new one is up and running. Love your added details. As Tim said earlier "it's the little extras that make a build your own"
scottie3158
SMF Supporter
Alan,
Some nice detailing it will make all the difference.
Some nice detailing it will make all the difference.
- Joined
- Apr 28, 2018
- Messages
- 6,212
- Points
- 113
- First Name
- Bob
Very nice Al, if I can do it so can you lol
Started to add various bits n bobs to the engine. I've noticed that Revell have duplicated each engine, which is fine but. On the port engine the aircraft hydraulic pump was located on this engine only. And Revell have modeled it without it (the bit that looks like it has a blanking plate). Meaning it's a starboard engine (x2). So i am going to add the pump with a little sprue tab i cut of one of the bits.
