1/32 Me262A-1a/U4 (JV44 Hunters and Protectors Project)

Jim R

SMF Supporter
Joined
Apr 27, 2018
Messages
13,732
Points
113
Location
Shropshire
First Name
Jim
You're really going to town with this Alan. A lot of work but already you can see how worth while it is.
 

AlanG

Moderator
Staff member
Moderator
SMF Supporter
Joined
Dec 2, 2008
Messages
7,494
Points
113
Location
Scotland
First Name
Alan
You're really going to town with this Alan. A lot of work but already you can see how worth while it is.

Something a little like this is just the little details that i hope to help show it off a little more. I am hoping to expose one engine. So a little detailing won't go amiss.

Also as i learn the extra little things along the way, i shall try to impart that knowledge to help others that follow in the future.

IMG_2712.JPG
 

Allen Dewire

Proud Rabble Member
SMF Supporter
Joined
Apr 27, 2018
Messages
4,105
Points
113
Location
Bamberg
First Name
Allen
Just catching up Alan and this is looking good!!! I have Revell's 1/32 U-1/B-1 nightfighter in the stash. If there are probs with your kit, please let us know about them, so I can make notes for mine. TIA and have fun. Nice extras for the kit too...

Prost
Allen
 

AlanG

Moderator
Staff member
Moderator
SMF Supporter
Joined
Dec 2, 2008
Messages
7,494
Points
113
Location
Scotland
First Name
Alan
I have Revell's 1/32 U-1/B-1 nightfighter in the stash. If there are probs with your kit, please let us know about them, so I can make notes for mine.
Phil Flory has done a build of it on YT. He mentions one issue regarding the rear bulkhead for the nightfighter cockpit. But very easy fixed. Have a watch/save it and it'll help no end
 

adt70hk

I know its a bit sad but I like quickbuild kits!!!
SMF Supporter
Joined
Sep 4, 2019
Messages
9,501
Points
113
First Name
Andrew
Afternoon Al. Coming on nicely.

ATB.

Andrew
 

AlanG

Moderator
Staff member
Moderator
SMF Supporter
Joined
Dec 2, 2008
Messages
7,494
Points
113
Location
Scotland
First Name
Alan
A little bit of drilling and a rat tail file tonight. Made holes for wiring, pipes and then the holes into the housing for the combustion chambers. A lot of tedious close quarter work. But hopefully it enhances it all when done.

IMG_2713.JPGIMG_2715.JPGIMG_2716.JPG
 

JR

Member of the Rabble and Pyromania Consultant
SMF Supporter
Joined
May 26, 2015
Messages
17,275
Points
113
Location
lincs
First Name
John
Like Andrea I'm very late to this , no excuses sorry .
Great detailing , love the idea of an exposed engine .
 

AlanG

Moderator
Staff member
Moderator
SMF Supporter
Joined
Dec 2, 2008
Messages
7,494
Points
113
Location
Scotland
First Name
Alan
Cheers John

Not sure if i'm going to hang the engine on the wing or have it to one side yet. I'll figure that out later :smiling3:
 

colin m

Moderator
Staff member
Moderator
SMF Supporter
Joined
Dec 26, 2008
Messages
8,604
Points
113
Location
Stafford, UK
First Name
Colin
Great work Alan. I built a little 1:72 262 sometime ago are really liked the shape. It's an aircraft I'd like to build again, it just looks, so right.
 

Tim Marlow

Little blokes aficionado
SMF Supporter
Joined
Apr 27, 2018
Messages
16,781
Points
113
Location
Somerset
First Name
Tim
Coming along extremely well Alan. Great looking bird the 262…..
 

adt70hk

I know its a bit sad but I like quickbuild kits!!!
SMF Supporter
Joined
Sep 4, 2019
Messages
9,501
Points
113
First Name
Andrew

Junior is available at a reasonable rate.... I'm serious.

In his first parents meeting at his then new high school, the head of maths described him as the most naturally gifted pupil he'd ever taught..... No idea where he got it from. It most certainly was NOT me or SWMBO......
 

AlanG

Moderator
Staff member
Moderator
SMF Supporter
Joined
Dec 2, 2008
Messages
7,494
Points
113
Location
Scotland
First Name
Alan
Thanks for the offer. After much brain scratching and one or two Beck's beers i have it sorted. My eldest son is the same though. Naturally gifted with brains. Common sense is lacking though lol
 

AlanG

Moderator
Staff member
Moderator
SMF Supporter
Joined
Dec 2, 2008
Messages
7,494
Points
113
Location
Scotland
First Name
Alan
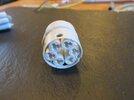
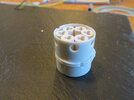
So why the mathematics? Well i had to work out what size the six combustion chambers of the Jumo 004 would have to be to fit inside the Revell depiction of the engine so that you could 'see' two chambers in each hole i drilled out. Took a bit to work out and to try and find something that i had readily available to use. I could have bought something off evilbay but the prices i were given imho weren't justifiable. Any how. Here is my progress

IMG_2720.JPG
IMG_2721.JPGIMG_2722.JPG
 

AlanG

Moderator
Staff member
Moderator
SMF Supporter
Joined
Dec 2, 2008
Messages
7,494
Points
113
Location
Scotland
First Name
Alan
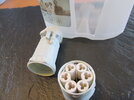
So scratch building again. On the engine in-between each of the combustion chambers is a divider. So rather than cutting up some plastic card i have, i decided to use an old empty milk bottle. It was only going in the recycling anyway, so it's nicely repurposed. Once they are all in place and are flat against the adjoining piece of engine, i am going to superglue everything in place (from the bottom) so i can then remove it and do some other work on it and paint it before refitting it. All this free and repurposed scratch building items makes me feel like @spanner570 :smiling3:

IMG_2723.JPG
 

AlanG

Moderator
Staff member
Moderator
SMF Supporter
Joined
Dec 2, 2008
Messages
7,494
Points
113
Location
Scotland
First Name
Alan
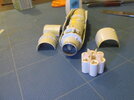
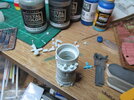
After a bit of back and forth with this. I have finally got it glued. The original ones didn't work out as i had already glued the housing together. So when i tried to remove them for further work, they split apart. Also tried Tamiya glue as i thought it would weld the plastic but it didn't. So superglue was used along with the other engine housing to create the 'mould' for the chambers. I am going to have to drill and file out the other housing now as i can see that i'll have to finish the work and the painting on the chambers then 'fit' the housing around them. This will save damaging them again. It's all trial and error. But i'm getting there with it. All this work for naff all to see afterwards :smiling3:

IMG_2725.JPG
 

Jakko

Way past the mad part
SMF Supporter
Joined
Apr 28, 2018
Messages
10,814
Points
113
First Name
Jakko
Also tried Tamiya glue as i thought it would weld the plastic but it didn't.
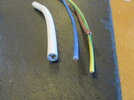
Chances are that the milk bottle is polyethylene and the electrical cord is PVC or something similar, both of which are hard to glue. There are solvent-based glues for PVC specifically and superglue probably works, but PE is almost impossible to really glue with anything except superglue combined with a pre-treatment that some glue manufacturers sell (usually as a kind of marking pen with which to apply it before using the glue). Since this will all be inside the engine, it really only needs to stick together long enough for you to be able to put it in place, though :smiling3:
 
Top