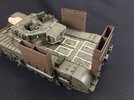
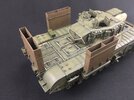
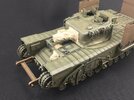
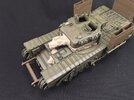
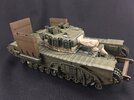
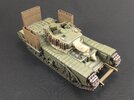
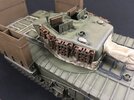
Churchill Mk. IV AVRE with Small Box Girder Assault Bridge Mk. II

Jakko

Way past the mad part
SMF Supporter
Joined
Apr 28, 2018
Messages
10,936
Points
113
First Name
Jakko
You use strong tone the same way I use Vallejo model wash black. I find it too strong undiluted so go fifty fifty with a drop or two of flow aid. After all, you can always add another layer if you want more shading.
I’ve not used the Vallejo washes, but it sounds like you’ve got the exact same idea I do: better to have to add more later than it being too much straight away. Strong Tone has about the same colour as Tamiya Smoke, but dries matt.

I tried Mig washes, but don’t like them: they’re far too strong and on top of that, you have to keep shaking them every couple of minutes else all the pigment sinks down again. The Army Painter stuff is transparent paint, and I get along with that much better by making a wash of it myself. I should buy a bottle of Vallejo and see if it works for me.

The wash has worked well and it nicely toned down.
It works well to draw the colours more together, though I think I will need to go back and drybrush with the Light Olive again because the highlights have mostly disappeared now too. This was a bit of an experiment to see if it would be better to highlight before the wash, instead of after as I normally do, and maybe it will work if I make the highlights a little stronger?

One thing I’m still debating how to do, is making the tank appear wet. It’s supposed to represent the vehicle when it was in the landing craft at sea, so I figure the upper surfaces would likely be wet from spray. Maybe a simple coat of semigloss varnish will do the trick, but I’ll need to experiment for that first.
 

Jakko

Way past the mad part
SMF Supporter
Joined
Apr 28, 2018
Messages
10,936
Points
113
First Name
Jakko
Slow progress now because it’s all small things that need doing. I painted the tape over the hatches and the turret stowage bin edges with a pale sand colour, mainly because the handbook photos show a very light colour for this tape. I don’t know what colour it was in real life, but a pale tan seems a reasonable assumption to me.

IMG_9870.jpeg

It’s not that neat, but it doesn’t need to be because both edges will be painted dark grey.

The exhausts are partly done:

IMG_9871.jpeg

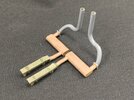
I painted the basic exhausts (the lower part) light brown and gave them a few washes of darker browns, then lightly stippled them with red-brown and orange-brown to give a bit of a rust effect. The deep-wading extensions, I painted medium grey followed by a dark grey wash. I want to add some light, random rust to them to represent brand-new pipes that have been exposed to salty sea air for maybe a few days.
 
Last edited:

Scratchbuilder

SMF Supporter
Joined
Jul 2, 2022
Messages
2,031
Points
113
Location
Luton
First Name
Mike
Well done Jakko, I like the tape. Memory serves me the old tape they used for boxes etc was a sand colour, and so this could have been the same item. Surprising what you could find in the back of the QM's stores. Tins of fruit from 1943, although it was not tried....
 

Jakko

Way past the mad part
SMF Supporter
Joined
Apr 28, 2018
Messages
10,936
Points
113
First Name
Jakko
The manual calls this Bostikote tape, which I’m guessing means it’s a specific type meant for waterproofing things. I suppose it’s some kind of treated fabric, which is part of why I decided on a light sand colour, but I stand to be corrected (though I probably won’t correct the model if somebody does a few years down the line :smiling3: ). The tinned fruit sounds delicious …
 

stillp

SMF Supporter
Joined
Nov 17, 2016
Messages
7,239
Points
113
Location
Rugby
First Name
Pete
Google found an advert for Bostikote tape in a 1954 issue of Practical Mechanics among several adverts for Government surplus items. It's described as white, 3 inches wide, 48 yards on a roll. Cost was 6/-
I don't suppose it was a bright white though.

Pete
 

Tim Marlow

Little blokes aficionado
SMF Supporter
Joined
Apr 27, 2018
Messages
16,854
Points
113
Location
Somerset
First Name
Tim
Google found an advert for Bostikote tape in a 1954 issue of Practical Mechanics among several adverts for Government surplus items. It's described as white, 3 inches wide, 48 yards on a roll. Cost was 6/-
I don't suppose it was a bright white though.

Pete
I found that. What a fascinating time capsule the magazine was. Articles about alien spaceships alongside a ‘how to‘ for motorising a clothes mangle…..priceless. Some of the stuff on sale is still in general use today….resin cored solder and Xacto knives, for example. Don’t think the TV interference suppressed black and decker power polisher being demonstrated by the housewife is one of them though….
 

Jakko

Way past the mad part
SMF Supporter
Joined
Apr 28, 2018
Messages
10,936
Points
113
First Name
Jakko
Google found an advert for Bostikote tape in a 1954 issue of Practical Mechanics among several adverts for Government surplus items. It's described as white, 3 inches wide, 48 yards on a roll. Cost was 6/-
I don't suppose it was a bright white though.
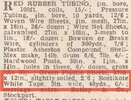
That would be page 269 of this one?

Bostikote advert.jpeg

Good find :smiling3: Searching some more for "Batley & Co" Stockport gives some hits in the British Newspaper Archive but you need to register to actually look at them, and I can’t be bothered :smiling3:

However, I did find the catalogue for the 81st Altrincham Show, held on 15 September 1954, at which Batley & Co had a stand. Their catalogue entry reads:

Batley & Co.jpeg

Combined, it looks to me like the kind of company that might have bought up army surplus stuff if it seemed useful to sell on to farmers and similar, so for all we know, the Bostikote used on Churchills and other vehicles was indeed white or off-white. I think I may go back and lighten the tape a little. Thanks for the research :smiling3:

What a fascinating time capsule the magazine was.
Google Books also has a lot of old magazines. A few years ago I came across a bunch of 1940s issues of the American Popular Mechanics on there and enjoyed myself a lot reading the articles and especially the ads :smiling3:
 

Tim Marlow

Little blokes aficionado
SMF Supporter
Joined
Apr 27, 2018
Messages
16,854
Points
113
Location
Somerset
First Name
Tim
That would be page 269 of this one?

View attachment 485111

Good find :smiling3: Searching some more for "Batley & Co" Stockport gives some hits in the British Newspaper Archive but you need to register to actually look at them, and I can’t be bothered :smiling3:

However, I did find the catalogue for the 81st Altrincham Show, held on 15 September 1954, at which Batley & Co had a stand. Their catalogue entry reads:

View attachment 485112

Combined, it looks to me like the kind of company that might have bought up army surplus stuff if it seemed useful to sell on to farmers and similar, so for all we know, the Bostikote used on Churchills and other vehicles was indeed white or off-white. I think I may go back and lighten the tape a little. Thanks for the research :smiling3:


Google Books also has a lot of old magazines. A few years ago I came across a bunch of 1940s issues of the American Popular Mechanics on there and enjoyed myself a lot reading the articles and especially the ads :smiling3:
That’s the one. Page 237 has the housewife with the power polisher on it…..
 

stillp

SMF Supporter
Joined
Nov 17, 2016
Messages
7,239
Points
113
Location
Rugby
First Name
Pete
I found that. What a fascinating time capsule the magazine was. Articles about alien spaceships alongside a ‘how to‘ for motorising a clothes mangle…..priceless. Some of the stuff on sale is still in general use today….resin cored solder and Xacto knives, for example. Don’t think the TV interference suppressed black and decker power polisher being demonstrated by the housewife is one of them though….
There were a few copies of that magazine as well as Practical Householder in my dad's shed. I used to find the adverts for government surplus stuff fascinating. I remember a common one was for RR Merlin superchargers at £7 10s each! Our allotment was fenced off with field telephone cable...
Pete
 

Jakko

Way past the mad part
SMF Supporter
Joined
Apr 28, 2018
Messages
10,936
Points
113
First Name
Jakko
By now I’ve completed the waterproofing with Tamiya XF-69 NATO Black:

IMG_9883.jpeg

On the engine deck, this went over the tape’s edges because this was overpainted with waterproofing stuff, but on the turret bin it only went under the tape, so I painted it up against the edges rather than over it. When taking the photo, I noticed I forgot to also do the part of the hinges on the outside, so I painted those after.

I also began painting the fabric covers:

IMG_9884.jpeg

The cover over the ventilator on the front deck was attempt No. 1: a base coat of a light sand colour, followed by a white drybrush and then Army Painter Soft Tone for the shadows. This was not satisfactory, so I painted the mortar and machine gun covers by hand instead: the same light sand, but with painted shadows and highlights in darker and lighter mixes of it. It’s not greatly visible in the photo, though.

The other fabric bits will get the same treatment but with slightly different colours, for variety.
 

Jakko

Way past the mad part
SMF Supporter
Joined
Apr 28, 2018
Messages
10,936
Points
113
First Name
Jakko
Now the rest of the fabric is also painted:

IMG_9887.jpegIMG_9888.jpeg

It’s a bit hard to see in the photos, but it’s a little darker than the first two bits, to provide contrast and indicate that the fabric over the mortar isn’t one piece with that around the turret ring. Again, there is a line of Tamiya NATO Black for the waterproofing Bostik “C” cement.
 

Jakko

Way past the mad part
SMF Supporter
Joined
Apr 28, 2018
Messages
10,936
Points
113
First Name
Jakko
I need to finish the wheels and tracks first, because of the need to add all kinds of stuff to the rear deck that would probably get damaged if I put it on before installing the tracks. I had already sprayed the tracks a darkish brown, and now added a wash made from paint that has the approximate colour of wet beach sand on Walcheren, reasoning that the sand in Ostend (where the real tank boarded the landing craft) is probably very similar in colour, given that it’s only about 50 km from here to there in a straight line. I also put the wash over the suspension, but not anywhere else on the tank.

The idea behind the wash is that there is some sand stuck in and on the tracks and suspension, but most of it would have fallen off due to movement and rain, as well as because I suspect the tank would have been cleaned to some degree before preparing it for deep wading.

When the wash had dried, I drybrushed the tracks with a medium brown and then painted all the parts that come into contact with the wheels or the ground with Humbrol Polished Steel, from a trusty tin I have owned for over 30 years :smiling3: Don’t use your best brush for this, by the way … Once the paint has had a few minutes to dry, you can buff it up to a metallic sheen, for which I used a soft toothbrush. Here is the inside, unpolished above, polished below:

IMG_9892.jpeg

As you can see, unpolished it’s just a medium grey, but after polishing, the paint takes on a realistic metallic shine. I also did that to the running surfaces of the roadwheels and the teeth on the idler:

IMG_9893.jpeg

The drive sprocket could also use the same treatment, but because it will be just about entirely out of sight, I didn’t bother.
 

Airborne01

SMF Supporter
Joined
Mar 30, 2021
Messages
3,215
Points
113
Location
Essex
First Name
Steve
Jakko

Thanks as always for the background info....knew quite a bit of it but still good to have some gaps filled in.

Made the Matchbox AVRE with SBG bridge in my teens and then also did one of the PSC wargaming kits with a rudimentary white metal and resin conversion kit on my return to the hobby, far from perfect looked ok from a distance.

Will definitely be following this, as my wife bought me an AFV Club Mk III for our wedding anniversary last year and still have in mind your comments/advice on tackling the suspension.

Are you going to do this largely OOB or do you have some modifications planned?

Good luck with the build.

ATB

Andrew

EDIT: Had meant to say that it cannot have been easy for your grandfather being a POW and for what I assume must have been the rest of the war.
Your wife gives you an AFV model for your wedding anniversary - WOW - mine gives me the bill for the expensive restaurant or 'weekend away' ...:astonished:
Steve
 

Jim R

SMF Supporter
Joined
Apr 27, 2018
Messages
13,819
Points
113
Location
Shropshire
First Name
Jim
Looking better with every update. That's a lot of wheels to polish. The story of the tape is interesting. Amazing how things stand the test of time. Certainly a model that people will talk about.
 

Jakko

Way past the mad part
SMF Supporter
Joined
Apr 28, 2018
Messages
10,936
Points
113
First Name
Jakko
Sorry Jakko.
No worries, unlike some here, I expect topic drift :smiling3:

That is a cracking build, your eye for details and research do you credit.
Thanks, but I always notice details later that make me think, “I should have caught that …”

Looking better with every update.
I sure hope so! ;) Though I would also post ot if I completely ruined the model somehow.

That's a lot of wheels to polish.
Just a few quick passes with the soft toothbrush, really :smiling3: It would have been much more work with a cloth, though.

Certainly a model that people will talk about.
As long as it lasts, sure …

Anyway :smiling3: After painting the track, I also painted the rubber tyres on the idler wheels, with my usual method of dark grey followed by a wash of thinned Indian ink. Then it came time to fit the tracks. How to do that in a few sort-of-easy steps: insert the track at the drive sprocket (that’s the rear) and push it forward. This will probably involve tilting the model this way and that (and a few more directions), pushing, wiggling and withdrawing it slightly a lot, until it finally emerges at the idler wheel. Pull it through far enough that both ends are about equally exposed. Then take some thread, loop it through the eyes in the track links to pull the ends together, and tie the thread off:

IMG_9894.jpeg

Don’t pull it taut when you do this, but leave it slightly slack because if you don’t, the track will be very tight around the wheels. With the knot tied, pull the track further (or back) around so both ends disappear:

IMG_9895.jpeg

This method works quite well and means you don’t have to build a full track. It will also do for any Churchill that has some, but not all of the mudguards on — even one piece is enough to hide the thread. Just make sure your track is long enough that it will pass the mud chute on the side at the front, because part of the track will be visible there.

Then all that remained was the other side, and it’s starting to look like a tank:

IMG_9896.jpeg

Here’s a close-up of the now-painted spare track links/armour on the turret:

IMG_9897.jpeg

These were painted a dark red-brown, then given a wash to shade them and drybrushed with medium brown for highlights.
 

adt70hk

I know its a bit sad but I like quickbuild kits!!!
SMF Supporter
Joined
Sep 4, 2019
Messages
9,526
Points
113
First Name
Andrew
Just a catch up Jakko. That's looking very, very good indeed.

And as always great research.

Very well done.

Andrew
 
Top