Early Scimitar.

Scratchbuilder

SMF Supporter
Joined
Jul 2, 2022
Messages
1,943
Points
113
First Name
Mike
Update,
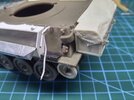
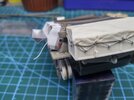
Will be thinning down the tie down on the rear stowage bin, that rope looks like it could hold the QE2 to the dock...
Tracks are now in primer/track primer and will be soon at the complete stage.
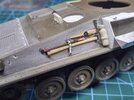
Decided to replace the stowage bin on the left side as the right side is now taken up with the new exhaust, exhaust pipe extension and soon the antennae stowage tube.
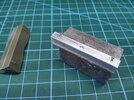
20230816_120433_HDR.jpg
So first job was the new cover/lid with hinge detail and fasteners added....
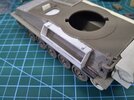
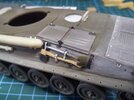
20230816_120448_HDR.jpg
The new stowage box from p/card with fastener hooks and second half of the hinge...
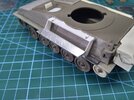
20230816_120630_HDR.jpg
And the full box finished. The plate on the right is the water bottle carrier.
Cheers
Mike.
 

adt70hk

I know its a bit sad but I like quickbuild kits!!!
SMF Supporter
Joined
Sep 4, 2019
Messages
9,501
Points
113
First Name
Andrew
Just had a catch-up Mike.

That is is outstanding work so far as always.

Very well done indeed!!

Andrew
 

Scratchbuilder

SMF Supporter
Joined
Jul 2, 2022
Messages
1,943
Points
113
First Name
Mike
Update,
Main day today has been adding tools and other items....
20230819_161049_HDR.jpg
Homemade crowbar and straps...
20230819_161107_HDR.jpg
Spade handle replaced and axe from resin set from now defunct company...
20230819_161124_HDR.jpg
Jerry can holder, strap will be attached once painting is complete. Side on view of rear tail light and indicator, waiting for lens...
20230819_161203_HDR.jpg
QE2 tow rope has been replace with even thinner one, although in this pic it looks the same, another view of tail lights...
That is it for today
Cheers
Mike.
 

Richard48

SMF Supporter
Joined
Apr 27, 2018
Messages
1,406
Points
113
Location
Clacton on sea
First Name
Richard
Nicely done.I used to live near Carver barracks where many recce regiments were based from 70s onwards.9th/12th,13/18th,Qdgs.My late friend Geoff was Squadron sergeant major with Qdgs.Miss my chats with him.When i was at secondary school my mate and i got a ride in the back of a Samaritan as the army brought some Cvrts to school fete.We used to get lines of them along the A11.Scorpions,Scims etc.
Carry on dear boy.
Richard
 

Scratchbuilder

SMF Supporter
Joined
Jul 2, 2022
Messages
1,943
Points
113
First Name
Mike
Nicely done.I used to live near Carver barracks where many recce regiments were based from 70s onwards.9th/12th,13/18th,Qdgs.My late friend Geoff was Squadron sergeant major with Qdgs.Miss my chats with him.When i was at secondary school my mate and i got a ride in the back of a Samaritan as the army brought some Cvrts to school fete.We used to get lines of them along the A11.Scorpions,Scims etc.
Carry on dear boy.
Richard
We just had a couple for testing (wrecking) Buller Kasserne in Munster was like a go cart track, even took them across the rail tracks to 'Pinky's Bar' for a few....
 

Scratchbuilder

SMF Supporter
Joined
Jul 2, 2022
Messages
1,943
Points
113
First Name
Mike
Update,
Progressing along with the build here are a few pics of the rest of the tools etc...
20230826_160723_HDR.jpg
20230826_160747_HDR.jpg
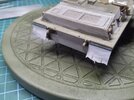
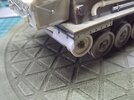
Front and rear mud flaps now in place with the obligatory wear and tear on the front ones from the tracks rubbing them away.
20230826_160801_HDR.jpg
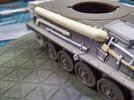
This is the antennae tube used for storing them when not in use.
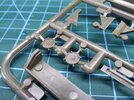
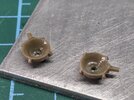
Now for the fun part, here is a pic of the kit headlights...
20230826_090851_HDR.jpg
So I decided to do something about them...
20230826_091051_HDR.jpg
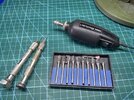
They were left on the sprue and then I first drilled out the centre all the way through to give me a guide hole, this was followed by a couple of different reamers using a small electric drill...
20230826_090947_HDR.jpg
Once happy I used liquid cement to smooth out the inside of the lamps. When dry I gave the inside a coat of Chrome Silver and while this was drying I made up a couple of light bulbs...
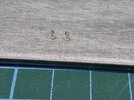
20230826_153526_HDR.jpg
The 'heads' were rounded off and then inserted from the rear of the lamps...
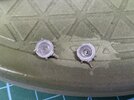
20230826_160607_HDR.jpg
And the lens were added from clear plastic and cemented in place with pva which you can see here. Once dry they will be left off and painted seperately.
More later
Cheers
Mike.
 

Scratchbuilder

SMF Supporter
Joined
Jul 2, 2022
Messages
1,943
Points
113
First Name
Mike
Superb mate the tools look excellent. What do you use for your straps?
Paper, I usually cut a strip from the edge of the Eduard instruction sheet or some printer paper and if shaping needed then a coat of VMS Paper Shaper. The buckles usuall come from the end of the etched strap or I use ABER 35 A21 buckles. Feed one bit of strap through the middle of the buckle and fold back and secure with a drop of c/a. Then feed the other part of the strap through the buckle as you would and then attach each end to the locating points etc.
 

JR

Member of the Rabble and Pyromania Consultant
SMF Supporter
Joined
May 26, 2015
Messages
17,275
Points
113
Location
lincs
First Name
John
Paper, I usually cut a strip from the edge of the Eduard instruction sheet or some printer paper and if shaping needed then a coat of VMS Paper Shaper. The buckles usuall come from the end of the etched strap or I use ABER 35 A21 buckles. Feed one bit of strap through the middle of the buckle and fold back and secure with a drop of c/a. Then feed the other part of the strap through the buckle as you would and then attach each end to the locating points etc.
Wibble for you a simple task , but for the majority a nightmare. Easier said than done I bet.
Wobble .
 

Jim R

SMF Supporter
Joined
Apr 27, 2018
Messages
13,735
Points
113
Location
Shropshire
First Name
Jim
Superb work as always Mike
As John says you make it sound much easier than it would be for us ordinary folk :smiling2:
 
Top