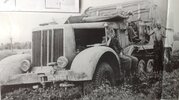
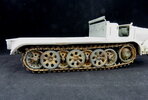
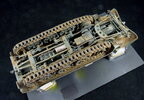
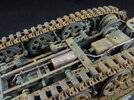
Jim's 1/35 Trumpeter Sd.Kfz 7/1

Airborne01

SMF Supporter
Joined
Mar 30, 2021
Messages
3,220
Points
113
Location
Essex
First Name
Steve
Thanks again guys. How time flies. I have serious doubts about finishing inside the GB time scale. This is slow.

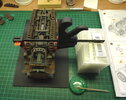
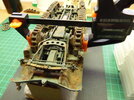
Tracks are built and basic painting done. They are still to be muddied up. The pads were too smooth so were roughed up a bit with my Como.
View attachment 465942

View attachment 465941


View attachment 465950

Leather seats also base coated.
View attachment 465949

Dashboard complete. The dial decals fit inside raised bezels and so I cut off excess carrier film so they would fit better. Micro Krystal Klear for lenses.
View attachment 465948

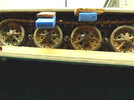
Wheels were all given a quite oil wash.
View attachment 465943

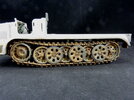
After the GB I want to show this in a dio - a nice muddy farm yard perhaps. So I set to with the pigments :tongue-out3:
Still work to be done but getting there.
View attachment 465944

View attachment 465945

View attachment 465946

View attachment 465947

Thanks again for your helpful and encouraging comments.
Where did you source the dashboard decals from mate? Very nice work there ...
Steve
 

Panzerwrecker

SMF Supporter
Joined
Mar 2, 2022
Messages
362
Points
93
First Name
Los
Thanks again guys. How time flies. I have serious doubts about finishing inside the GB time scale. This is slow.

Tracks are built and basic painting done. They are still to be muddied up. The pads were too smooth so were roughed up a bit with my Como.
View attachment 465942

View attachment 465941


View attachment 465950

Leather seats also base coated.
View attachment 465949

Dashboard complete. The dial decals fit inside raised bezels and so I cut off excess carrier film so they would fit better. Micro Krystal Klear for lenses.
View attachment 465948

Wheels were all given a quite oil wash.
View attachment 465943

After the GB I want to show this in a dio - a nice muddy farm yard perhaps. So I set to with the pigments :tongue-out3:
Still work to be done but getting there.
View attachment 465944

View attachment 465945

View attachment 465946

View attachment 465947

Thanks again for your helpful and encouraging comments.
Nice one Jim. You’re a brave man for attacking those track pads. I have thought about how pristine they look but figured they wouldn’t stand up to too much punishment even with a sanding stick! They look good and used now


The dash looks great too :thumb2:
 

The Smythe Meister

Born to be WILD....... until about 9pm
SMF Supporter
Joined
Jan 30, 2019
Messages
5,812
Points
113
Location
Devon
First Name
Andy
That`s looking excellent Jim :thumb2: ,
Some great slurry chuckin`...... I do love a mucky truck!!:cool:
 

Allen Dewire

Proud Rabble Member
SMF Supporter
Joined
Apr 27, 2018
Messages
4,122
Points
113
Location
Bamberg
First Name
Allen
That is some fine mucking up there, Jigs!!! Looking really good and that dash and the worn tracks are top drawer work Sir, as is the whole build!!!

After the GB I want to show this in a dio - a nice muddy farm yard perhaps.

Sounds like a good idea Jim. Just don't make it too muddy or it could end up like this poor Famo did,

IMG_3233.JPG
Buried up to the frame and all the shovels in the world couldn't dig it out...............

Prost
Allen
 

grumpa

SMF Supporter
Joined
Jan 14, 2015
Messages
4,691
Points
113
First Name
Jim
Hey Jim, just went through this and love every bit of it so far.
Great detail and love the 'pre-mudding' of the chassis, have been so busy of late, but I try to pop in once and a while.

Take care and keep a stiff upper:thumb2:
Jim.
 

Graeme C.

SMF Supporter
Joined
Apr 29, 2018
Messages
1,487
Points
113
First Name
Graeme
Just had a catch up Jim, it's coming along nicely, that dash does look good.
Allen, a big winch & a hi-lift jack needed there!
 

Mini Me

SMF Supporter
Joined
Jun 1, 2018
Messages
10,162
Points
113
First Name
Rick
I must have been following Graeme, as I also just had a read through......Jim, that is coming along just great. I hadn't noticed there was a second step at the top of the frame (PE tread plates) nice bit of info for my next build......also your seat cushions look suitably "knackered"....did they come that way or did you create that effect? If so, how did you accomplish that feature?....very convincing by the way. Looking forward to the next update. :thumb2:
 

Jim R

SMF Supporter
Joined
Apr 27, 2018
Messages
13,840
Points
113
Location
Shropshire
First Name
Jim
Thanks again guys for your posts. This kit is quite a challenge for my abilities and so the comments are very welcome.

Wheels and track fitting. I've been dreading it 'cause I knew it was make or break.
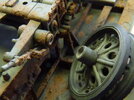
First thing was the attachment of the idlers. This was how Trumpeter would have it done. No way would that be strong enough.
P1070185.JPG

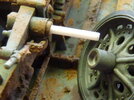
I drilled out the mounting and inserted a length of plastic rod
P1070186.JPG

Slapped on a load of cement and hopefully it will be solid enough.
P1070190.JPG

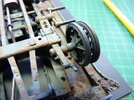
Now there was a similar problem with the drive wheels but I couldn't see how the same solution would work. So I fitted the track around the drive wheels, without glue, and threaded it loosely around the other wheels. I used 2 part epoxy to glue the drive wheels in place. Stuck a clamp on and hopefully by tomorrow the epoxy will be solid and I can join the tracks and get them to sit properly. I haven't fitted the outer wheels yet as they will be easy to fit after the tracks are fixed and if I need to CA the track to the centre, double wheels the outer wheels will hide any glue mess. Well that's the plan anyway :thinking:

P1070191.JPG

P1070192.JPG

Thanks once again.
 

JR

Member of the Rabble and Pyromania Consultant
SMF Supporter
Joined
May 26, 2015
Messages
17,375
Points
113
Location
lincs
First Name
John
Jim, great work, some of those photos , esp the one of the wheel weathered look real. When I read you have problem's with track s sometimes I feel slightly clear of failure.Very nice and off course clean !

MiniArt wheels stubs are exactly the same, not way would they last . I'm going to get some round plastic rod in ready
 

JR

Member of the Rabble and Pyromania Consultant
SMF Supporter
Joined
May 26, 2015
Messages
17,375
Points
113
Location
lincs
First Name
John
That is some fine mucking up there, Jigs!!! Looking really good and that dash and the worn tracks are top drawer work Sir, as is the whole build!!!


Sounds like a good idea Jim. Just don't make it too muddy or it could end up like this poor Famo did,

View attachment 466040
Buried up to the frame and all the shovels in the world couldn't dig it out...............

Prost
Allen
Excuse me Jim.

Its no wonder then that that chap sitting on the side of the engine looks so hacked off is it.
 

Steve Jones

Steve Jones Scale Modelling Site
Joined
Apr 27, 2018
Messages
6,698
Points
113
Location
Plymouth
First Name
Steve
Its hard work this modelling lark Jim!. Great solution to the problem
 

Jim R

SMF Supporter
Joined
Apr 27, 2018
Messages
13,840
Points
113
Location
Shropshire
First Name
Jim
Update time for all those patient enough to still be following along.

Roll of drums, much cheering and back slapping etc. etc. Track is done. :smiling:

The track was joined. Didn't take much fiddling, 54 links as per instructions. I then glued the top run to the centre, double road wheels and wedged the track in place.
P1070193.JPG

Fitted the outer wheels.
P1070194.JPG

P1070195.JPG

Underside.
P1070196.JPG

P1070197.JPG

There are a few places which will need touch up/refining but that will wait until the very end. Now it's just the top half to complete.

Thanks for all your support. Happy modelling.
 

Mini Me

SMF Supporter
Joined
Jun 1, 2018
Messages
10,162
Points
113
First Name
Rick
Nicely done there Jim......we are still here, eagerly awaiting your next move. ;)
 
  • Like
Reactions: JR

Tim Marlow

Little blokes aficionado
SMF Supporter
Joined
Apr 27, 2018
Messages
16,874
Points
113
Location
Somerset
First Name
Tim
Very good looking chassis there Jim. Like it a lot.
 

Steve Jones

Steve Jones Scale Modelling Site
Joined
Apr 27, 2018
Messages
6,698
Points
113
Location
Plymouth
First Name
Steve
Update time for all those patient enough to still be following along.

Roll of drums, much cheering and back slapping etc. etc. Track is done. :smiling:

The track was joined. Didn't take much fiddling, 54 links as per instructions. I then glued the top run to the centre, double road wheels and wedged the track in place.
View attachment 466491

Fitted the outer wheels.
View attachment 466492

View attachment 466493

Underside.
View attachment 466494

View attachment 466495

There are a few places which will need touch up/refining but that will wait until the very end. Now it's just the top half to complete.

Thanks for all your support. Happy modelling.
Well done Jim. There is always a sense of relief once the tracks are complete. Onwards and upwards my friend
 
Top