You are using an out of date browser. It may not display this or other websites correctly.
You should upgrade or use an alternative browser.
You should upgrade or use an alternative browser.
Sukhoi Su-27 Flanker B Trumpeter Scale 1:32
- Thread starter arb65912
- Start date
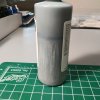
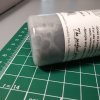
Was the bottle stored on its side at some time? First set of marks look like tracks left by the internal ball bearing in a settled paint film. If you keep shaking the bottle they should eventually disappear as the pigment is stirred back into solution. In the second shot, those look like bubbles created in the paint during mixing. Try the paint on a test object first, before throwing it out.
- Joined
- Apr 28, 2018
- Messages
- 10,834
- Points
- 113
- First Name
- Jakko
It dependsI want to do wash using Flory's wash coming soon and I want to try Dry Brush as well.
Which one I do first?
 A dark wash will accentuate detail by adding shadows around parts, drybrushing with a lighter colour will accentuate detail by highlighting it. The normal order is to do the wash first, and after letting that dry thoroughly, to drybrush over it. If you don’t wait until it’s dry, you’ll end up smearing out some of the wash with your drybrushing, and that generally doesn’t look great
However, as wash darkens the overall appearance of the painted area, you can use that to your advantage to “soften” the appearance of drybrushing. That is to say, if you drybrush first and add the wash after, the drybrushing will become more blended in with the underlying paint. But, of course, at the same time it will become less obvious. This can be compensated by using a paler colour than normal for the drybrushing (before the wash), but once again, this is a matter of experience …
In the end, it depends on the effect you want to achieve, and of course, you can always wash and/or drybrush again to enhance the effect. With a wash it’s generally best to not make it too dark to start with — if it’s not obvious enough you can always go over it again with a darker wash, but toning down a wash that’s too dark is much harder. For drybrushing, it’s the other way around: if it’s too light, it’s hard to correct, but not light enough is easy.
Hi Tim,Was the bottle stored on its side at some time? First set of marks look like tracks left by the internal ball bearing in a settled paint film. If you keep shaking the bottle they should eventually disappear as the pigment is stirred back into solution. In the second shot, those look like bubbles created in the paint during mixing. Try the paint on a test object first, before throwing it out.
No, the bottle was straight from the wherever I bought it from.
I will test it somewhere before ditching it.
Thank you, Jakko!!!It dependsA dark wash will accentuate detail by adding shadows around parts, drybrushing with a lighter colour will accentuate detail by highlighting it. The normal order is to do the wash first, and after letting that dry thoroughly, to drybrush over it. If you don’t wait until it’s dry, you’ll end up smearing out some of the wash with your drybrushing, and that generally doesn’t look great
However, as wash darkens the overall appearance of the painted area, you can use that to your advantage to “soften” the appearance of drybrushing. That is to say, if you drybrush first and add the wash after, the drybrushing will become more blended in with the underlying paint. But, of course, at the same time it will become less obvious. This can be compensated by using a paler colour than normal for the drybrushing (before the wash), but once again, this is a matter of experience …
In the end, it depends on the effect you want to achieve, and of course, you can always wash and/or drybrush again to enhance the effect. With a wash it’s generally best to not make it too dark to start with — if it’s not obvious enough you can always go over it again with a darker wash, but toning down a wash that’s too dark is much harder. For drybrushing, it’s the other way around: if it’s too light, it’s hard to correct, but not light enough is easy.

I like the explanations and I already made a mistake before using black wash on no gloss, just painted surface, total disaster, I think I posted the description here.
I will use wash first and then try dry brush. It is all experimenting and learning and I love it!

Tim, just to let you know, I used that funny looking Grey Stynylrez and it seems to be fine. Will try sand a bit tomorrow.Was the bottle stored on its side at some time? First set of marks look like tracks left by the internal ball bearing in a settled paint film. If you keep shaking the bottle they should eventually disappear as the pigment is stirred back into solution. In the second shot, those look like bubbles created in the paint during mixing. Try the paint on a test object first, before throwing it out.
rtfoe
SMF Supporter
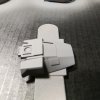
I am guessing that a puddle of Pledge may have accumulated there. I normally wicker away as much of the Pledge liquid and place the canopy at an angle where most of the liquid can flow away leaving a thin film.Here is my front canopy and broken back one.
Take a careful look at the pictures. I dipped the front one in the Pledge Floor Finish (after sanding with various grits and polishing with auto plastic compound.
There is shady area, and it is not on the outside or inside, I looked against light.
How did that happen? Something I did or it was there, I do not remember now.
The cracked and glued canopy will be sanded and dipped in Pledge Floor Finish, but cracks will be visible, so I am not trying to make cockpit look nice, I made mistakes and glued it together so it is very hard to do anything.
This is my learning and testing model anyway, so it is all good!
Let me know what you think about that grayish area. I am very curious how it happened.
Cheers,
Richard
I was also thinking that, Richard.I am guessing that a puddle of Pledge may have accumulated there. I normally wicker away as much of the Pledge liquid and place the canopy at an angle where most of the liquid can flow away leaving a thin film.
Cheers,
Richard
But then I inspected it really carefully and it does not look like it is on the outside. Is it possible that Pledge kind of got inside? Sounds not very likely, no?
That is exactly what I did. I will take picture from different angle. Not a big deal for this project for known reasonsWhen you dip the canopy it should be the whole part inside and outside.
Cheers,
Richard
 but I am curious what is the cause of it. Was it like that when I bought it or I made it?
- Joined
- Apr 28, 2018
- Messages
- 10,834
- Points
- 113
- First Name
- Jakko
You can easily make your own washes: put a few drops of paint on a palette (like a jar lid or a glazed tile), and thin it until it flows like water. Pre-mixed washes are often much stronger than thinned paint is, plus, by thinning paint you can make a wash in any colour you like and without the need to buy another bottle of something 

That will be something to experiment with one day but on different model probably.You can easily make your own washes: put a few drops of paint on a palette (like a jar lid or a glazed tile), and thin it until it flows like water. Pre-mixed washes are often much stronger than thinned paint is, plus, by thinning paint you can make a wash in any colour you like and without the need to buy another bottle of something
Thanks, Jakko.
Something totally new.

Fuselage halves glued together!!!!!! 
How was the experience? I would say..................hmmmm..... intense.
Trying to apply glue and holding pieces when they were trying to pull apart from each other.
Next, I will reinforce from inside adding more glue, when dry I will prepare to glue nose cone in.
So much FUN!!!!
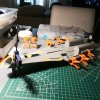
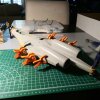

How was the experience? I would say..................hmmmm..... intense.
Trying to apply glue and holding pieces when they were trying to pull apart from each other.
Next, I will reinforce from inside adding more glue, when dry I will prepare to glue nose cone in.

So much FUN!!!!


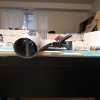
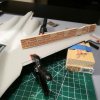
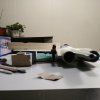
Hello, the fun continues.
Fuselage glued just fine, added more glue inside to make sure all is connected.
Sanding, sanding and more sanding, dry fitting things, it will have to be good and symmetrical.
I think I will do more final sanding of the fuselage and glue in wings, then nose cone and after that putty and more sanding and primer (Stynylrez).
QUESTION, is the order I described, OK?
Thank you for the comments!!!


Andy the Sheep
SMF Supporter
I'm following your progresses with great interest, Andrzej. I share your fears and doubts as I still have many of them. As an old modeller back to the hobby (at very slow speed) after 3 decades, I still have a lot to learn before properly manage many of the new techniques and products now available.
Fun, of course, is paramount, so keep enjoying your build.
Andrea
Fun, of course, is paramount, so keep enjoying your build.

Andrea
Valeron
SMF Supporter
It's looking good.
It's also looking absolutely massive. I guess that's because I've only built 1/72 scale aircraft so far.
It's also looking absolutely massive. I guess that's because I've only built 1/72 scale aircraft so far.
- Joined
- Apr 28, 2018
- Messages
- 10,834
- Points
- 113
- First Name
- Jakko
I’m not really an aircraft modeller, let alone in this scale, but it sounds good to me. If anyone on here had built this kit as well, they probably would have spoken up with advice by now, so I think the best thing to do is what you seem to be doing: thinking it through before actually doing itis the order I described, OK?

@Andy the Sheep Hi Andrea, yes, I do have many doubts and make many mistakes but as I said before, this is my learning/testing kit so I am "allowed" to make mistakes. 
Coming back after 3 decades, yes, you were away for a while but there are no races, take your time and enjoy all to the max!!!
I can imagine that techniques and available sources changed a lot after 30 years but that is good, I like learning new stuff and I hope you too.
Send the link to what you build, I will follow.
Thanks!
@Valeron : it IS huge, I am working on a dinner table and every time I am done I need to move it away, lol,lol. Such a setup in small apartment.
Even with 1:32 scale there are parts of the missiles I do not know how I am going to handle, so small.
I am glad I picked that sale.
@Jakko : I believe that a lot comes to just thinking before gluing as I try to do.
Certain order has to be maintained but so far, I think I am good.
I am thinking what to glue on first, wings or nose cone????


Coming back after 3 decades, yes, you were away for a while but there are no races, take your time and enjoy all to the max!!!
I can imagine that techniques and available sources changed a lot after 30 years but that is good, I like learning new stuff and I hope you too.

Send the link to what you build, I will follow.
Thanks!
@Valeron : it IS huge, I am working on a dinner table and every time I am done I need to move it away, lol,lol. Such a setup in small apartment.

Even with 1:32 scale there are parts of the missiles I do not know how I am going to handle, so small.
I am glad I picked that sale.
@Jakko : I believe that a lot comes to just thinking before gluing as I try to do.
Certain order has to be maintained but so far, I think I am good.
I am thinking what to glue on first, wings or nose cone????


