Trumpeter 1/35 BTM-3 High Speed Trench Digger

Dave Ward

Still Trying New Things
SMF Supporter
Joined
Apr 27, 2018
Messages
8,711
Points
113
Location
South Gloucestershire
First Name
David
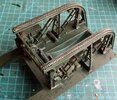
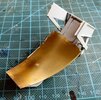
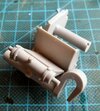
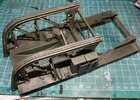
Nearly completed the workbed ........................
DSCF3648.JPGDSCF3649.JPG
A problem is the lack of any really positive location points for the side frames - there are shallow holes on the decking & very shallow pins ( more like pimples ) on the frame mounts. It would be a great help to drill these out & replace them with small metal ( brass? ) pegs to give a good register. I spent about 30 minutes fiddling, when, If there was an absolute location, it would only take 5 minutes.
There are still a few bits to add, more stowage boxes, but nothing too major.
After that will be the bucket wheel - it has 15 build stages, some of which won't be understood until I actually dry fit them!
Dave
 

scottie3158

SMF Supporter
Joined
Apr 27, 2018
Messages
12,768
Points
113
Location
Spalding
First Name
Paul
Dave,
Looking good. If it was me, I would go for the pegs as you have said for a more positive location but also for strength.
 

Dave Ward

Still Trying New Things
SMF Supporter
Joined
Apr 27, 2018
Messages
8,711
Points
113
Location
South Gloucestershire
First Name
David
Dave,
Looking good. If it was me, I would go for the pegs as you have said for a more positive location but also for strength.
Paul,
unfortunately you actually have to try to assemble the thing before it becomes obvious - I hope those with the model in their stash take note! Too late for my model, but it all went together in the end - great invention, superglue!
Dave
 
Joined
Apr 12, 2019
Messages
2,215
Points
113
Location
Selkirk
First Name
Andy
Paul,
unfortunately you actually have to try to assemble the thing before it becomes obvious - I hope those with the model in their stash take note! Too late for my model, but it all went together in the end - great invention, superglue!
Dave
Thanks dave, something to remember.

Andy.
 

Graeme C.

SMF Supporter
Joined
Apr 29, 2018
Messages
1,487
Points
113
First Name
Graeme
It's coming together nicely Dave, despite all the issues, you're making a good job of it.
 

Dave Ward

Still Trying New Things
SMF Supporter
Joined
Apr 27, 2018
Messages
8,711
Points
113
Location
South Gloucestershire
First Name
David
On to the bucket wheel - all I can say is pay attention to the part numbers and dry fit!...........
DSCF3664.JPG
DSCF3665.JPG
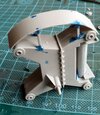
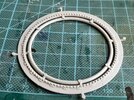
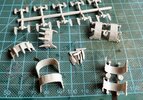
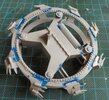
On first glance, I didn't realise you had to trim away the inner ring!
DSCF3666.JPG
DSCF3667.JPG
Eight separate buckets, each with 5 separate teeth & the locations are not that clear................
DSCF3668.JPGDSCF3669.JPG
The bucket locations are indicated by very faint outlines, and make sure you fit them the right way round - I didn't, luckily realising the mistake straight away. The lack of positive location could mean the buckets spaced unevenly, so care must be taken. The use of the blue glue is helpful, to see where you've applied it - but it looks a mess afterwards.
Dave
 

Dave Ward

Still Trying New Things
SMF Supporter
Joined
Apr 27, 2018
Messages
8,711
Points
113
Location
South Gloucestershire
First Name
David
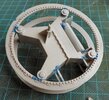
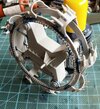
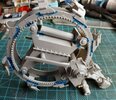
The Chinese puzzle continues......................... it took me over an hour to assemble this:
DSCF3671.JPG
DSCF3670.JPG
Not at all sure that the big bit of PE was necessary, but as there is no alternative, you have to fit it - this seems to be the 'plough' blade - the bucket wheel removes the soil - I think. It seems like trying to find out how a clock works from a bag of cogs! The next stages just seem to be assemblies of random bits, but I'm certain I'll have a Eureka moment, when all becomes clear!
Dave
 

Jakko

Way past the mad part
SMF Supporter
Joined
Apr 28, 2018
Messages
10,948
Points
113
First Name
Jakko
TBH, that etched part looks like a good one to replace by some thin plastic card by using the etched one as a template. Should be easier to glue along that rounded plastic frame, anyway.
 

Dave Ward

Still Trying New Things
SMF Supporter
Joined
Apr 27, 2018
Messages
8,711
Points
113
Location
South Gloucestershire
First Name
David
TBH, that etched part looks like a good one to replace by some thin plastic card by using the etched one as a template. Should be easier to glue along that rounded plastic frame, anyway.
Probably would be easier - as it is, I annealed it, clamped it & ran CA along the joint. I had to make sure that it was in the correct position, as there was quite a bit of CA & it's never going to come off now!
Dave
 
Joined
Apr 12, 2019
Messages
2,215
Points
113
Location
Selkirk
First Name
Andy
The PE looks to be a bit of an unnecessary fiddle ,if they had moulded a plastic part it would surely been easier to build. I may try a bit of acetone sheet when I get around to doing mine.

Andy.
 

adt70hk

I know its a bit sad but I like quickbuild kits!!!
SMF Supporter
Joined
Sep 4, 2019
Messages
9,526
Points
113
First Name
Andrew
Not the easiest looking of builds Dave.....

ATB.

Andrew
 

David Lovell

SMF Supporter
Joined
Apr 27, 2018
Messages
1,510
Points
113
Location
Poole Dorset
First Name
David
Great stuff so far Dave as you say nothing wrong with fit of parts love the dogged persistence that's getting you over the line. Dave
 

Dave Ward

Still Trying New Things
SMF Supporter
Joined
Apr 27, 2018
Messages
8,711
Points
113
Location
South Gloucestershire
First Name
David
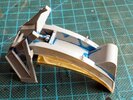
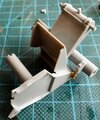
Another session - an assembly of what appears to be random bits.....................
DSCF3673.JPGDSCF3674.JPG
Poring over the instruction, and loads of dry fitting - I couldn't take a picture of any intermediate stage, 'cos I needed all 3 hands to fit the bits togetherDSCF3675.JPG
The central bit, sandwiching the bucket wheel is just the drive to turn the bucket ring ( Incidentally the line on the top cylinder is the blue glue, not a duff joint! ).
It took me about 1 1/2 hrs to do this assembly, it takes careful study of the parts & loads of dry fitting. The parts fit well, but I disagree with some of the sequences of assembly. Adding small parts too early just begs for them to be knocked off, the later the better. So far I have found one numbering mistake & that was so obvious that I didn't notice it at first!
I've been thinking about when and how to start the painting - not yet!, and airbrush is the only way to go ( maybe dipping............ ?) - I hate to think how long it would take to brush paint, and even spraying, I reckon it'll take several sessions for complete coverage, I'm just happy that it's one colour, with a bit of detail painting over the top.
Dave
 

Tim Marlow

Little blokes aficionado
SMF Supporter
Joined
Apr 27, 2018
Messages
16,860
Points
113
Location
Somerset
First Name
Tim
Loving this….very dieselpunk in appearance…..
 
Top