You are using an out of date browser. It may not display this or other websites correctly.
You should upgrade or use an alternative browser.
You should upgrade or use an alternative browser.
Rick's 1-87 Scale Luftwaffe Phanomen Granit 25H Ambulance
- Thread starter Mini Me
- Start date
Hi Andy, I suppose it is pretty small, I made it from a piece of .010 brass rod. By comparison, it's twice as big as the .004 stainless steel rod I used to make the vane sight on my Tiger II awhile back  ..... All good fun! Thanks for stopping by.

Not much to show for progress. The rear doors are all but finished I just need to make a window crank for the right hand door....apparently it was a functional window. I also made a false floor out of styrene for the back of this vehicle so I can build the stretcher rack and the bench that sits opposite of it for the stretcher bearers/Medics. This way I will be able to detail paint everything after it is assembled and not have to try masking it all off for the inside/outside final paint on the body. I can just glue it in place after final painting and lower the body down over it once the glue has set.....the logistics of this build are proving to be quite formidable.....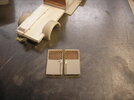

scottie3158
SMF Supporter
Great work mate I would struggle with this detail in a bigger scale.
Don't think you could get it any neater Rick, a marvel you can even see it yet alone do what you have .Thanks Guys, I wish it was a little neater, but once I get it covered in white paint, most of it will disappear anyway.
Well thanks JR....I will admit though I have been struggling with this little bugger. What makes it so interesting is the fact that there is a wealth of photo references on this particular vehicle so there are more than the usual detail shots available.....if I see 'em I gotta make 'em! 


Jim R
SMF Supporter
A few have commented on the neatness of your work and I will certainly go along with that. You have a real ability to work at this ridiculous scale 

A little more from the "ridiculous scale" modeler 
 The original vehicle, as you can see in the photo (for ref. only) has a roof rack on it as well as narrowly spaced boards to help support the load carried on it. I knew I couldn't stick this together with CA as it set so quickly that I would never get these things evenly spaced at .010 of an inch, so I cut a proper width sheet of .005 thick sheet styrene and went to work with my liquid cement and scale 1x3" boards using a razor blade with the edge knocked off it as a spacer. I weighted it down overnight to get a good bond and today I hand lapped it on a surface plate until you could see the boards through the sheet stock they were glued to. Once again, placement is critical so I used 5 min epoxy to stick 'em down to the roof.
The railing will be installed just before the paint stage, to keep me from knocking the flimsy little thing off.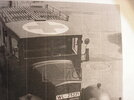
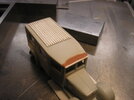

The railing will be installed just before the paint stage, to keep me from knocking the flimsy little thing off.


Last edited:
scottie3158
SMF Supporter
Excellent!
Better hope Matron doesn't see this! If you keep working to this level of detail in such a tiny scale you'll have her chasing after you because she will know you're certifiably insane!
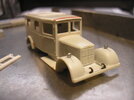
Sorry for the lack of updates, been trying to work out the stretcher rack and crew seating. So while mulling that over, I decided I needed to finish up the doors and windows minus the clear stuff. The window crank on the back door is located and installed and I have the various privacy panels in place at various heights, to not only create a little interest but also to mimic the slew of ref. pics. I have collected in the process.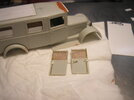

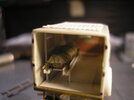
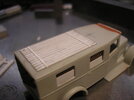
This is moving very slowly....I've been working out the logistics of the interior fittings, based on the limited supply of materials available. The channel strips for the stretcher racks are grossly oversized, but its the smallest available so I'm stuck with it. Looks a little clumsy but will be mostly hidden. I also found in my spares box, a pair of small lights I adapted for the fender marker lights (none provided in the kit) and I found a ref. pic. that showed the roof rack had two metal bands to secure it to the roof so scratched those out of .005 styrene. Next up will be the crew bench and the other stretcher rack, but in the stowed position against the bulkhead above the bench.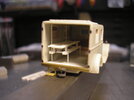


Coming along nicely.


