- Home
- Forums
- Military Vehicles
- Military Vehicles Under Construction
- Armoured Vehicles Under Constuction
You are using an out of date browser. It may not display this or other websites correctly.
You should upgrade or use an alternative browser.
You should upgrade or use an alternative browser.
Rick's 1-87 Scale Trident Jagdpanther Conversion
- Thread starter Mini Me
- Start date
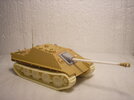
Spent the morning adding the block off plates for the driver's second periscope and the Panther A antenna location on the rear engine deck. After that it was knock of the molded on blobs over the tops of the crew periscopes and fabricate and install those little beauties. I tried (not very convincingly) to add some weld bead to the top Glacis and roof line as well as tooling it down the sides and around the back.....Jury's still out on this till after paint flies.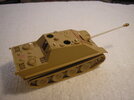
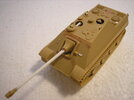
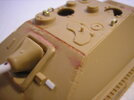


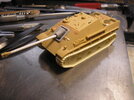
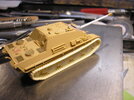
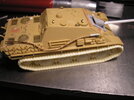
I have now unleashed my secret weapon....that's right, the unbeatable resin track assembly with full track face detail! What will become of the 1-72nd scale competitors when they see that they have been outdetailed by the lowly 1-87 scale model, vying for a position in the world of acceptable scales? Stay tuned, more to come.....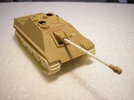
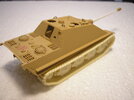


Wow Rick the size of the tool blade against the complete model just shows how small 1/87 is. Wouldn't surprise me if you said were able to make the tracks from separate links as well .
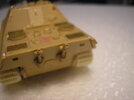
From a distance, it does not look like much has been done however, I managed to get all the hatches in place, all the handles for said hatches, all screens have been final installed, the MG ball was located and filled and sanded, you can't see them but the lower sponson plates are in and the exhaust (early type) has been installed after drilling them out with a .020 dia. bit. and finally, the roof antenna mount has been drilled out for a .015 dia. brass rod which I still have to turn down so it has a proper taper to it.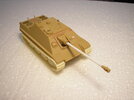
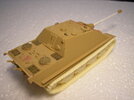


Blimey, that's come on since I last saw it Rick , what a neat job you've made of it,and the resin track assemblies are awesome...it ALL looks fantastic
  .
.
 , what a neat job you've made of it,and the resin track assemblies are awesome...it ALL looks fantastic
  .
.Got a few outside chores to take care of so not much to post up......Got some Mr. Surfacer on the gunshield and the cast aperture. I think I might need to "knock" it down a bit more. In the second shot I have located the bars that the side skirt brackets will suspend from......still have to make 'em up out of brass stock. Since I do not intend to have any skirting on this vehicle, I'm sure their absence would be noticed. 
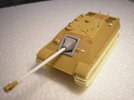
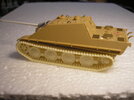


David Lovell
SMF Supporter
Hi Rick solid stuff so far ,I'm currently doing a jumbo scale ,one way strangely of getting some juices flowing again ,could you please elaborate on the cast effect using the mr surfacer ,ive go a pot of the 500 wich I think is the thick one? I ask because I've got a couple of 72nd russkies built and put away(lack of mojo)that would benefit from some cast turret detail ,fore warned is fore armed so to speak before I take matters into my own hands. Cheers Dave
Hi David and yes, more than happy to 'splain how I do it. 500 is what you want, leave it thick but not buttery. I use a cut down acid brush with about a quarter of an inch of bristles left on it. that makes a fairly stiff brush for the "stipple" effect you will need. if you are planning on doing a large area, then you will need a large brush to get the paint on fairly quickly and you will probably have to do a section at a time. This paint dries quickly so after a few minutes you need to start your stippling....the more you stipple the more the brush pulls the paint up and produces a more and more coarse texture. I always go coarser than I need because once the paint has dried, you can knock it down with different grits of paper to get the final effect you are looking for. I strongly recommend you practice on a piece of card stock or an old model, just too get the feel of working with Mr. Surfacer. If you need to thin it I use T-103. Good luck
David Lovell
SMF Supporter
Thanks Rick ,I've got into the habit of priming and spraying the underside as best I try with the up side of the model ,then any filters etc are tried for effect before taking them up top ,so always a little bit of blank canvas somewhere ,big thanks again for coming back with the help when it happens will show warts and all. Dave
Thanks for the kind words Jakko.
I'm currently looking for the proper size "silk Screen" mesh for future builds. I'm hoping to find a local supplier if not, there's always Amazon. Also, once it's painted the current mesh will blend in better and sort of become a lot less noticeable. At least that's what happened on the last one I built.
I'm currently looking for the proper size "silk Screen" mesh for future builds. I'm hoping to find a local supplier if not, there's always Amazon. Also, once it's painted the current mesh will blend in better and sort of become a lot less noticeable.


