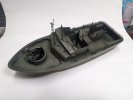
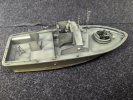
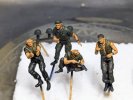
Tamiya 1/35 PBR (pibber)

JR

Member of the Rabble and Pyromania Consultant
SMF Supporter
Joined
May 26, 2015
Messages
17,362
Points
113
Location
lincs
First Name
John
Think I'll just stand Andy as your definitely on a roll .
Remember one of these being done before some time ago on here or in the " other place".
Looking good , some neat looking paintwork on the fire extinguisher & life ring.:thumb2:
 

The Smythe Meister

Born to be WILD....... until about 9pm
SMF Supporter
Joined
Jan 30, 2019
Messages
5,796
Points
113
Location
Devon
First Name
Andy
Bloody ell !!:astonished:...
.. you're a building machine mate!!:anguished:.... haven't had a chance to look in for a while and you've done all THIS?!! :rolling:
Looking excellent buddy,loving it:cool:
 

Andy T

SMF Supporter
Joined
Apr 26, 2021
Messages
2,043
Points
113
Location
Sheffield
First Name
Andy
Thanks all.

It's a surprisingly large model that took quite a bit of paint. At least I have an even base coat down all over and can break it down into smaller sections now.
 

Jim R

SMF Supporter
Joined
Apr 27, 2018
Messages
13,819
Points
113
Location
Shropshire
First Name
Jim
Great progress. Lots of separate sub assemblies to paint. I think the thing I dislike most is a model where there are lots of pre-painted parts to fit. Nice to see the figures fit OK. Paint job is looking good.
 

Waspie

SMF Supporter
Joined
Mar 13, 2023
Messages
2,625
Points
113
Location
Portland - Dorset
First Name
Doug
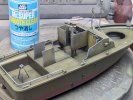
One of the options is for hull red below the waterline. Since I had some Tamiya from a job lot I decided to use that:

View attachment 491771

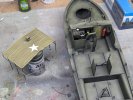
While that was drying I sprayed the bits & bobs in some of the many versions of olive drab I have, to give variety:

View attachment 491772

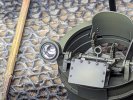
I painted the radar dome in the optional grey and detail painted the fire extinguisher & life ring:

View attachment 491773

Terrible picture but the canvas "roof" was done in a desaturated khaki:

View attachment 491774

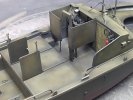
The hull was dry by now so I masked it up and started the main painting. I'm using the Mr Color modulation set so I gave everything a coat from the shadow bottle. I can use this as a foundation to build up the highlights & variation, at least knowing there's some colour all over:

View attachment 491775

View attachment 491776
That would pass Admirals Inspection! :thumb2:
 

Andy T

SMF Supporter
Joined
Apr 26, 2021
Messages
2,043
Points
113
Location
Sheffield
First Name
Andy
Thanks Jim & Doug.

Yes, the final assembly bit isn't my favourite either but with this being quite "open", with no defined interior & exterior, I don't think I have much choice.
 

Andy T

SMF Supporter
Joined
Apr 26, 2021
Messages
2,043
Points
113
Location
Sheffield
First Name
Andy
Well, the wife and I have both succumbed to the latest flavour of covid so I've not felt like doing much, but I've powered on a bit.

I still need to sort a more neutral background for my pictures so here's a couple on black & white. Shows how much difference it makes!

1000004628.jpg

1000004632.jpg

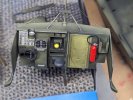
The cockpit area is now painted up, just needs a bit more work then I can fit it into place for final weathering:

1000004634.jpg

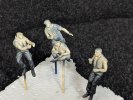
And the figures received some primer and an airbrushed coat of a base flesh colour:

1000004633.jpg
 

Jakko

Way past the mad part
SMF Supporter
Joined
Apr 28, 2018
Messages
10,936
Points
113
First Name
Jakko
I still need to sort a more neutral background for my pictures so here's a couple on black & white.
You seem to be using some kind of carpet for the black background, right? If I may give a minor tip here: for the file size of the pictures, a plain background with no texture will be far better :smiling3: JPEG compression doesn’t like small, irregular textures — they add a lot of bytes to the file size.
 

JR

Member of the Rabble and Pyromania Consultant
SMF Supporter
Joined
May 26, 2015
Messages
17,362
Points
113
Location
lincs
First Name
John
Andy , that 3rd photo is absolutely top class. The shading is perfect . What paints are you using ?
 

The Smythe Meister

Born to be WILD....... until about 9pm
SMF Supporter
Joined
Jan 30, 2019
Messages
5,796
Points
113
Location
Devon
First Name
Andy
Stunning paintwork Andy:cool:,
.... I struggle with getting decent pictures too,good tip from Jakko re the backgrounds there:thumb2:.
 

Andy T

SMF Supporter
Joined
Apr 26, 2021
Messages
2,043
Points
113
Location
Sheffield
First Name
Andy
Looking good, doing a nice job on it. Nice to see Tamiya still have good detailing on their models.
Thanks. The kit is actually over 30 years old, the more recent designs I've built were even better.

Stunning paintwork Andy:cool:,
.... I struggle with getting decent pictures too,good tip from Jakko re the backgrounds there:thumb2:.
Thanks Andy.

Andy , that 3rd photo is absolutely top class. The shading is perfect . What paints are you using ?
Thanks John, I think the more neutral colour of the background helps.

I'm using Mr Color for the spray work, AK acrylic for brushing.

The Mr Color is one of their modulation sets that come with 4 shades. Shadow, normal, highlight, extreme highlight. I know I could mix those myself but it can help having them pre mixed if I need to go back and do touch ups later, although I often mix them together as well to get intermediate shades.
 
Last edited:

JR

Member of the Rabble and Pyromania Consultant
SMF Supporter
Joined
May 26, 2015
Messages
17,362
Points
113
Location
lincs
First Name
John
Thanks. The kit is actually over 30 years old, the more recent designs I've built were even better.


Thanks Andy.


Thanks John, I think the more neutral colour of the background helps.

I'm using Mr Color for the spray work, AK acrylic for brushing.

The Mr Color is one of their modulation sets that come with 4 shades. Shadow, normal, highlight, extreme highlight. I know I could mix those myself but it can help having them pre mixed if I need to go back and do touch ups later, although I often mix them together as well to get intermediate shades.
Thanks Andy , certainly has a nice surface finish.
 

Andy T

SMF Supporter
Joined
Apr 26, 2021
Messages
2,043
Points
113
Location
Sheffield
First Name
Andy
Thanks Nick & Paul, although I've had a bit of a set back to deal with.

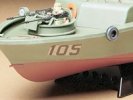
I don't like decals at the best of times and I guess I should have used a stencil, but after applying them yesterday they were sealed in this morning with a coat of VMS gloss varnish, and this happened!
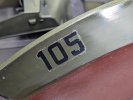
1000004641.jpg

I'd already tried sanding at this point to see if I could improve it. The star on the roof wasn't quite so bad but still starting to curdle slightly at the edges:
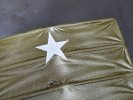
1000004642.jpg

I spent a lot of time faffing & fiddling, sanding and touching up the edges and after an eventual coat of VMS matt varnish it's looking a whole lot better I think:
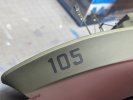
1000004644.jpg

Not perfect but a damned sight better than it was, and an improvement over the one on Tamiya's official website:
top.jpg

I'm still feeling as rough as a badgers behind and have slept for much of the day in between coats of this & that, but might get some more done this evening.
 

Jakko

Way past the mad part
SMF Supporter
Joined
Apr 28, 2018
Messages
10,936
Points
113
First Name
Jakko
Wow, that’s an odd effect around the edges of the number — I don’t think I’ve seen that before. But you fixed it well enough, this is about as good as those thick Tamiya decals will ever end up, IMHO.
 

Andy T

SMF Supporter
Joined
Apr 26, 2021
Messages
2,043
Points
113
Location
Sheffield
First Name
Andy
Cheers. It was certainly a heart stopping moment!

I've done a little bit more, picking out the lamps with GSW chrome. I'm quite impressed. Looks chrome-like and brushes pretty well for an alcohol based paint.

1000004645.jpg

With the cabin area now finished (apart from the transparencies) I've cemented it in place so I can do some weathering in the nooks & crannies.

I've also finished the canvas top. After fixing the decal and a coat of varnish it was dry brushed with dark yellow then buff for a faded effect.

1000004646.jpg

Time for some food and an early night I think.
 

Andy T

SMF Supporter
Joined
Apr 26, 2021
Messages
2,043
Points
113
Location
Sheffield
First Name
Andy
Due to the size of this thing I thought I'd try a rattle can for the matt coat. It could be pilot error but I ended up with the dreaded frosting

1000004663.jpg

So had to get the airbrush out anyway. It's fixed most of it and a bit more work should sort the rest.

1000004664.jpg

I've also had a quick go at the figures. I wasn't really feeling it but they'll suffice.

1000004667.jpg
 

BattleshipBob

Bob, bob, bobing along!
SMF Supporter
Joined
Apr 28, 2018
Messages
6,240
Points
113
First Name
Bob
Very nice Andy and a interesting kit. Just starting to view what's going on after my disappeared for a while!
 
Top