- Home
- Forums
- Military Vehicles
- Military Vehicles Under Construction
- Armoured Vehicles Under Constuction
You are using an out of date browser. It may not display this or other websites correctly.
You should upgrade or use an alternative browser.
You should upgrade or use an alternative browser.
Warrior IFV with a few bits added
- Thread starter Scratchbuilder
- Start date
Scratchbuilder
SMF Supporter
Scottie, Andrew & Si,
Many thanks for your kind comments.
Update,
The right side is now complete.
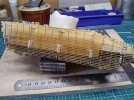
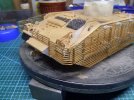
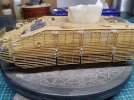
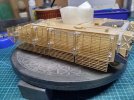
Here you can see the finished side and the replacement bolt heads and nuts...
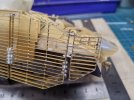
Here are the 3 replacement joiners for the last frame. I have given this a slight upward tilt as I intend to show some slight damage to the front corner frames.
More later
Cheers
Mike.
Many thanks for your kind comments.
Update,
The right side is now complete.

Here you can see the finished side and the replacement bolt heads and nuts...

Here are the 3 replacement joiners for the last frame. I have given this a slight upward tilt as I intend to show some slight damage to the front corner frames.
More later
Cheers
Mike.
Scratchbuilder
SMF Supporter
scottie3158
SMF Supporter
That looks the nuts
Jim R
SMF Supporter
That armour is very impressive. A masterclass in skill and patience.
You said that the complete armour had to be razor bladed off the tile. Is there anything that the pe could be assembled on that CA doesn't stick to ??
You said that the complete armour had to be razor bladed off the tile. Is there anything that the pe could be assembled on that CA doesn't stick to ??
- Joined
- Apr 28, 2018
- Messages
- 10,864
- Points
- 113
- First Name
- Jakko
Polyethylene sheet?Is there anything that the pe could be assembled on that CA doesn't stick to ??
Jim R
SMF Supporter
I tried a piece of that sheet stuff that is meant to go in the bottom of an oven to make cleaning easy. That worked up to a point.
Scratchbuilder
SMF Supporter
Jim,I tried a piece of that sheet stuff that is meant to go in the bottom of an oven to make cleaning easy. That worked up to a point.
When the etch assembly is complete where I have put the c/a to glue the etch it sometimes goes down onto the tile (just a small droplet) and basically what it does is holds the piece in place. So once I have given it time to dry which is normally the length of time it takes me to cut out the next frame and clean the two or three burrs off. I then slide a single edge razor blade under the piece and gently lift it and it comes free.
What I will do is on the next piece is I will do a series of pics to show you my method from the start of the process, skip the actual assembly and then show the removal and clean up. And this is on a tile I have used many times.
Scratchbuilder
SMF Supporter
Just put a small tutorial on the 'Tutorials' section about etch as described above.
scottie3158
SMF Supporter
Just had a read nice little SBS.Just put a small tutorial on the 'Tutorials' section about etch as described above.
Scratchbuilder
SMF Supporter
Thanks Paul, pleased you like it.Just had a read nice little SBS.
Scratchbuilder
SMF Supporter
Update,
Yeah I know even more slat.... the pain will soon be over...
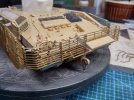
That is the front end joined up and the nuts and bolts added
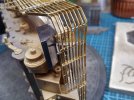
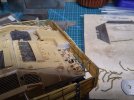
Above are two views of the revised front brace, Will do the left hand one later when I get to adding the nuts and bolts on that side. The 'U' shaped items in the background are for the rear corners...
Cheers
Mike.
Yeah I know even more slat.... the pain will soon be over...

That is the front end joined up and the nuts and bolts added


Above are two views of the revised front brace, Will do the left hand one later when I get to adding the nuts and bolts on that side. The 'U' shaped items in the background are for the rear corners...
Cheers
Mike.
Don’t know how I missed this one Michael, had a good look through the build so far, and some great work done. Just pulled up my chair at the back now. So I don’t miss anything else.
Scratchbuilder
SMF Supporter
Hello Ian, welcome and just in time for the boring parts, finishing the build and painting. There should be a further update added today.Don’t know how I missed this one Michael, had a good look through the build so far, and some great work done. Just pulled up my chair at the back now. So I don’t miss anything else.
Scratchbuilder
SMF Supporter
Update,
The build part is now over, all that was required was to add the slat armour to the turret...
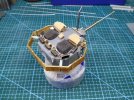
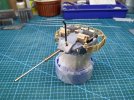
And there it is ready for paint and primer.
Priming has taken place - well it did after the drama - When I have finished painting and cleaning up the a/brush I have taken to leaving out the needle... So today I got everything ready to paint, turned on the air, mixed up the primer, filled the cup. pressed the button and thought "where is all this paint coming from????" Guess who forgot to put the needle back in the a/brush..... And forgot to prime the wheels.... Still there is always tomorrow.
Cheers
Mike.
The build part is now over, all that was required was to add the slat armour to the turret...


And there it is ready for paint and primer.
Priming has taken place - well it did after the drama - When I have finished painting and cleaning up the a/brush I have taken to leaving out the needle... So today I got everything ready to paint, turned on the air, mixed up the primer, filled the cup. pressed the button and thought "where is all this paint coming from????" Guess who forgot to put the needle back in the a/brush..... And forgot to prime the wheels.... Still there is always tomorrow.
Cheers
Mike.
Scratchbuilder
SMF Supporter
Update,
All primed up and nowhere to go...
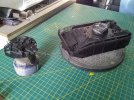
Sunday morning and base coat on...
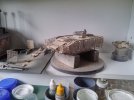
Well when you forget that the clocks go back and you leap out of bed, grab the pup and set off for the morning walk you begin to wonder where everyone is.... and why the pup is looking at you a bit strange....
Matron - up the meds....
Mike.
All primed up and nowhere to go...

Sunday morning and base coat on...

Well when you forget that the clocks go back and you leap out of bed, grab the pup and set off for the morning walk you begin to wonder where everyone is.... and why the pup is looking at you a bit strange....
Matron - up the meds....
Mike.
Excellent example of PE work at the max.
scottie3158
SMF Supporter
Mike looking most excellent.


