That’s looking excellent Gerry. The PE in this instance is adding nicely to the effect.
- Home
- Forums
- Group Builds
- The New Group Builds (2017 on)
- The User Created Group Builds
- 2022 Builds
- Lee's Soviet Tanks GB: Feb - April 2022
You are using an out of date browser. It may not display this or other websites correctly.
You should upgrade or use an alternative browser.
You should upgrade or use an alternative browser.
Gerry's Trumpeter 1/35 Armoured Aerosan
- Thread starter GerryW
- Start date
GerryW
Rest In Peace
Finally managed to get the first one to look something like the illustration in the destructions - it seems to match the requested shape, just hasn't got the curve just before the buckle
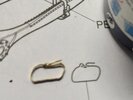
The bucket of paint on the right is a Humbrol enamel tin
Possibly a little clearer pic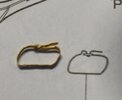
And finally, got both done (ish! Using two pairs of tweezers and magnifiers) and fixed to the spare prop - second wasn't as bad to work with as the first!
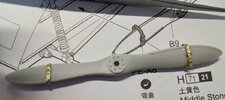
Just got to get the paint onto these - might leave the 'buckles' as brass, as I take it that the straps would be leather.

The bucket of paint on the right is a Humbrol enamel tin

Possibly a little clearer pic

And finally, got both done (ish! Using two pairs of tweezers and magnifiers) and fixed to the spare prop - second wasn't as bad to work with as the first!

Just got to get the paint onto these - might leave the 'buckles' as brass, as I take it that the straps would be leather.
Last edited:
rtfoe
SMF Supporter
Tried using the magnifier on your images but they were still blur.  Really tiny aren't they...just don't sneeze. Good job though Gerry. You don't really need that kink. Maybe try burnishing to create the fold over the buckle once glued onto the prop.
Cheers,
Richard
 Really tiny aren't they...just don't sneeze. Good job though Gerry. You don't really need that kink. Maybe try burnishing to create the fold over the buckle once glued onto the prop.
Cheers,
Richard
Jim R
SMF Supporter
Well done Gerry. Those pe straps are excellent.
Jim
Jim
Nice scratch work Gerry great updates too I like the ech work
GerryW
Rest In Peace
Thanks Richard, I cheated by folding the etch at the centre of the buckle and at where the buckle joins the strap, so that all I really needed to do was to feed the strap through - I'll try to get some better photos, but can't guarantee!Tried using the magnifier on your images but they were still blur.Really tiny aren't they...just don't sneeze. Good job though Gerry. You don't really need that kink. Maybe try burnishing to create the fold over the buckle once glued onto the prop.
Cheers,
Richard
Thanks Jim, still getting my head round working with PE. Think that I might be getting a lot of practice, as I'm not even halfway through the PE - there's 40 bits just for the skis!Well done Gerry. Those pe straps are excellent.
Jim
Thanks Lee, will try to get more time on this, and keep updating.Nice scratch work Gerry great updates too I like the ech work
Neil Merryweather
SMF Supporter
The easy way to do etched buckles is to bend the short pointy end of the strap back on itself where the buckle would be and feed both long and short ends through at the same time. Then flatten them away from the buckle afterwards and only then wrap it around the object.
Hope that's not patronising? Annealing helps as well
Looking good Gerry
N
Hope that's not patronising? Annealing helps as well
Looking good Gerry
N
GerryW
Rest In Peace
Neil, I'll take any help with PE that anyone offers - this is the first time that I've tried using it, so I wouldn't class your comment as patronisingThe easy way to do etched buckles is to bend the short pointy end of the strap back on itself where the buckle would be and feed both long and short ends through at the same time. Then flatten them away from the buckle afterwards and only then wrap it around the object.
Hope that's not patronising? Annealing helps as well
Looking good Gerry
N

- Joined
- Apr 28, 2018
- Messages
- 10,963
- Points
- 113
- First Name
- Jakko
That’s half the trick to successfully building a kit with parts like theseI cheated

Tworrs
SMF Supporter
Superb work Gerry!
GerryW
Rest In Peace
Thanks John, at times I have been tempted to just put it all back into the box and pack it off somewhere! Putting the first strap through was daunting, once I'd found the 'easier' way of bending the buckle, wasn't too bad with the second one! Think that I'm slowly getting the hang of this here PE - mind you, still got the really fiddly bits to do!If all else fails send it to Paul Scott Gerry !
Really though you've done really well , putting those through the buckle must have been so frustrating.
Thanks GarrySuperb work Gerry!
GerryW
Rest In Peace
Certainly not the 'best' introduction to PE - now started in earnest with it, there's no way that I'd be able to work with this without the magnifiers 
The sprue
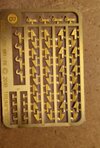
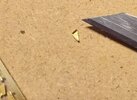
First bit bent into shape (the blade is a Stanley 10-601)
So far, about an eighth of the way through the two sets, and having a break plus coffee! (Plastic bag is one from a LFT - got loads of them!) There's two sets, as they're 'handed' - left and right.
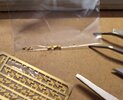

The sprue

First bit bent into shape (the blade is a Stanley 10-601)

So far, about an eighth of the way through the two sets, and having a break plus coffee! (Plastic bag is one from a LFT - got loads of them!) There's two sets, as they're 'handed' - left and right.

Jim R
SMF Supporter
Hi Gerry
You're doing a truly great job with the pe. Just take it slowly with plenty of breaks. I find that bad language helps - well no actually it doesn't but by 'eck you'll feel better
Jim
You're doing a truly great job with the pe. Just take it slowly with plenty of breaks. I find that bad language helps - well no actually it doesn't but by 'eck you'll feel better
Jim
GerryW
Rest In Peace
Thanks Jim, think that I must be getting the hang of this section, as I've now got a quarter of the way (10 of 40) through (another break) and the carpet monster is still hungry.Hi Gerry
You're doing a truly great job with the pe. Just take it slowly with plenty of breaks. I find that bad language helps - well no actually it doesn't but by 'eck you'll feel better
Jim
Plan is to get all of this PE done before starting assembly of the skis, then I'll take from the relevant bag as I build.
The simplest plans are often the best….Well, they're done and in the bags along with the 'hooks', just got to remember that parts B1 are in the bag labelled B3, and B4 are with B2

GerryW
Rest In Peace
I would've labelled up with the extra numbers, but couldn't be bothered to go and get the sharpieThe simplest plans are often the best….

Airborne01
SMF Supporter
And --- let's not forget no plan survives first contact with the enemy ... !The simplest plans are often the best….
Steve
