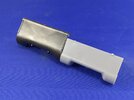
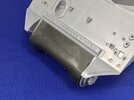
Jakko’s Zvezda M4A2 Шерман, 1:35 scale

Jakko

Way past the mad part
SMF Supporter
Joined
Apr 28, 2018
Messages
10,784
Points
113
First Name
Jakko
Not too late for me to join this, I hope. I’m kind of in need of something to build that doesn’t need a lot of effort, so I settled on wanting to add an M4A2 Sherman to my collection, to be built from this kit:

1255511-65375-28-pristine.jpg


I don’t actually have it in my possession yet, but have ordered it so with a bit of luck I should get it in time to finish it before the end of April :smiling3:
 

Jim R

SMF Supporter
Joined
Apr 27, 2018
Messages
13,719
Points
113
Location
Shropshire
First Name
Jim
Hi Jakko
Can't really go wrong with a Sherman. Zvezda kits vary a lot in quality although their newer kits are generally very nice. Interested to see what you make of this.
Jim
 

Jakko

Way past the mad part
SMF Supporter
Joined
Apr 28, 2018
Messages
10,784
Points
113
First Name
Jakko
This one is a bit over a year old, so I’m not worried, and though it has a few known accuracy issues, I’m confident I can correct those given the amount of Sherman spares I’ve accumulated in recent years :smiling3:
 

JR

Member of the Rabble and Pyromania Consultant
SMF Supporter
Joined
May 26, 2015
Messages
17,275
Points
113
Location
lincs
First Name
John
Why on earth should we think that :nerd:
This will be an interesting build so seat at the front please .
 

Jakko

Way past the mad part
SMF Supporter
Joined
Apr 28, 2018
Messages
10,784
Points
113
First Name
Jakko
I hope you'll enlighten us as to the nuance that makes it an M4A2
Since my kit hasn’t arrived yet (not too surprising, I ordered it yesterday and I would be very surprised to get it delivered on a Sunday anyway), let’s start with the background information.

The Medium Tank M4, later to be better known as the Sherman, after its British name, was developed in the USA in 1941 on the basis of the Medium Tank M3 (“Lee” and “Grant” to the British, depending on the exact version). That itself was an interim tank based on the Medium Tank M2 (no nickname — nobody would have wanted that tank in a shooting war anyway) to get a well-armed tank in production while a better one (the M4) was being designed.
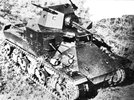
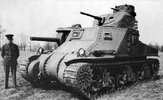
Medium Rank M2A1.jpegMedium Tank M3.jpg

The first photo is an M2, the other is an M3. On the M2, note the overabundance of machine guns, while on the M3, those have been toned down but the 75 mm main gun is in an awkward location. The M4 fixed all of that:
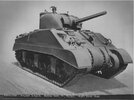
Medium Tank M4.jpg

It was a modern design, with a good gun and good armour for the time, as well as being easy to maintain. Its primary drawbacks were its so-so suspension that didn’t provide a very good ride (but not too bad either), its very tall engine (because it used a radial aircraft engine) that lead to a tall hull, and the complicated way the hull front was built up, which lead to it being relatively weak. The M4 had a hull welded from rolled plates and castings, though the details of this vary per manufacturer, and a cast turret. As an alternative, a fully cast upper hull was designed as well and standardised as the M4A1. If you see a Sherman with smooth lines rather than an angular upper hull, it will be an M4A1 — but only if the whole upper hull is cast, else it’s a late-production M4 which had a cast front but welded middle and rear parts of the upper hull (or possibly an M4A6, but only 75 of those were built, out of a total of 49,234 Shermans made from early 1942 through the autumn of 1945).

The choice of engine proved to be a problem once war production really began to ramp up, because aircraft radial engines obviously had other uses than powering tanks. It had been chosen because aircraft engines are both powerful and compact, which is useful for a tank as well, but even during production of the M3 it became obvious that alternative engines would be needed if enough tanks were to be built. Several variants of the M3 appeared with different engine fits, and because the M4’s lower hull — everything from the upper run of the tracks down — was essentially identical to the M3, it was easy enough to adapt the M4 to these engines too.

The first alternative engine was from General Motors, model number 6046. This brings us to the fact that the Sherman’s official designation basically tells you which engine each variant uses:
  • M4: Continental R975 9-cylinder radial petrol
  • M4A1: Continental R975 9-cylinder radial petrol
  • M4A2: GM 6046 12-cylinder (twin 6-cylinder) diesel
  • M4A3: Ford GAA V8 petrol
  • M4A4: Chrysler A57 30-cylinder (five 6-cylinder) petrol
  • (M4A5: Continental R975 9-cylinder radial petrol — though this is not a Sherman but the American designation for the Canadian Ram Cruiser Tank that was developed separately from the M3, in parallel to the M4)
  • M4A6: Ordnance Engine RD-1820 9-cylinder radial diesel

Here, we’re talking about the M4A2:
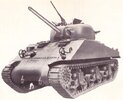
Medium Tank M4A2.jpg

Its GM 6046 consisted of two six-cylinder inline diesel engines side-by-side on a common crankcase, and necessitated a change in the engine deck to give it enough air. Compare the engine decks in these pictures:
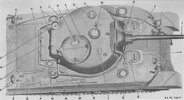
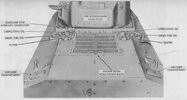
Medium Tank M4 (late).jpgM4A2 engine deck.jpg

The first is an M4 (with the cast hull front), which has a large lid directly behind the turret; this covers the air intake. The second photo has a grill there instead, which also extends further back on the engine deck. This grill is the primary recognition point for an M4A2: if you can see the engine deck, look for this type of grill and you know there is a GM twin diesel underneath.

As an aside, though, just the presence of a grill is not enough to ID an M4A2, because the M4A3 had one as well:
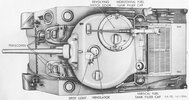
Medium Tank M4A3.jpg

You need to look at the size of the grill too: the M4A2’s is about half the width of the engine deck while the M4A3’s is the full width (and it’s set a little further back on the engine deck).

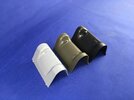
The other good way to tell Sherman variants apart is if you can see the rear of the lower hull. The different engine types had different access doors on the rear plate, and easiest of all is out subject here, the M4A2: this had two horizontal mufflers, usually with a curved plate in front of them. If you can see that, you are 100% certain looking at an M4A2, because none of the other variants had external mufflers.

From the front, the difference between the M4, M4A2, M4A3 and M4A4 is very hard to tell unless you really know what details to look for — and even then it’s frequently impossible to say exactly.

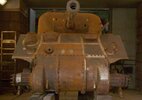
Now, as I said, one of the chief problems of the Sherman was the way its glacis plate was fabricated. This photo from the Sherman Minutia web site (and it happens to be an early M4A2) shows it very well:
m4a2alco_6.jpg

The bright lines are welds (except on the horizontal bit with the five bolt holes and everything below that), and though the exact build-up varied per manufacturer, they were all essentially similar to this: several different plates, welded together into a single glacis plate. This was rather weaker than a single plate would have been, so quite why it was designed like this beats me.

A second problem was the hatches for the driver and his assistant, which were set in a little protruding bay, and that presented a vertical face to the enemy which made them weak spots as well. Experience also showed the hatches to be on the small side, making escape difficult for the crew. (Among Sherman aficionados, tanks with these are known as “small hatch” versions.)

The solution was to redesign the whole front of the tank:
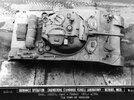
Medium Tank M4A2 (late).jpg

The hull front was now one single plate, with just a hole in it for the bow machine gun, and the hatches were made larger and set diagonally instead of straight. The revised hatches necessitated that the front plate was less sloped, but it was also thickened from 51 mm to 64 mm to compensate. (The M4A1 as well as the M4 with cast front were similarly redesigned.)

As part of this redesign, other modifications were also made. You may notice in the last picture above that there is a second hatch on the turret roof, that all the previous ones shown lack. This is because escape proved difficult for the loader, who had to duck under the gun and then go up and out through the commander’s hatch, so he was given his own hatch to increase his chances of survival.

Internally, major changes were made as well. Up until the redesign, Shermans had had most of their ammunition stowed in the sponsons (the parts of the hull overhanging the tracks). This proved to be a very vulnerable location, because this is the part that was most easily hit by enemy fire, and a penetrating round would then hit the ammunition — splitting cases and spilling propellant everywhere, which then frequently ignited. Contrary to popular belief, fires in tanks are not usually caused by its fuel, but rather, by the ammunition being hit. The first fix was to weld plates on the outside of the hull, over the ammo racks, and also add thin armour plates over the racks on the inside. This was done both by army workshops on tanks already delivered, as well as by factories overhauling existing tanks and in factories building new tanks.

The real solution, though, was to redesign the inside of the tank, which went hand-in-hand with the revised glacis plate. This moved all ammunition stowage to the hull floor, where it was very much less likely to be hit; these new stowage bins were double-walled, with a water–antifreeze mixture in the space between the walls so that if the bin as penetrated, it would flood the bin and smother propellant fires. As a result, Shermans with these bins are known as “wet stowage” and the earlier type as “dry stowage”. Tanks with wet stowage never have the additional armour plates on the hull sides — with which Tamiya put generations of modellers building the old Tamiya M4A3 on the wrong foot :smiling3: That kit includes the plates as an optional extra, when no tank of the type portrayed by the kit ever had them. However, a few hundred M4A2 tanks were built with the revised glacis plate but dry stowage ammo racks. This is probably the cause of Tamiya’s mistake, because as said, from the front the difference between an M4A2 and A3 is very hard to tell.

All this brings us to the Zvezda kit: that is of an M4A2 and includes the extra armour plates, meaning it can be built as one of the pretty rare M4A2 “dry” tanks. (By leaving off the armour plates, you can also build it as a slightly later tank with wet stowage, of course.)

Now, why is it a Soviet tank? Quite simply because the USA supplied the USSR with large numbers of M3 and M4 medium tanks during the war, under the Lend-Lease Act. The Soviets wanted diesel-engined tanks, because all their own tanks used diesel engines, and the only diesel Sherman available as the M4A2, so the majority of those went to the USSR and were used from (I think) late 1943 until the end of the war. M4A2’s were also used by the UK, France and the US Marine Corps, but rarely by the US Army, which preferred first the M4 and M4A1, and later the M4A3.

After the war, the USSR returned the surviving tanks to the USA, as per the requirements of Lend-Lease (which stipulated that the equipment supplied remained US property and had to be returned if possible). The tanks were generally loaded up onto American ships in the Russian Far East, the ships would sail away, and once in international waters … dump the unwanted tanks overboard into the Pacific Ocean …
 
Last edited:

Jakko

Way past the mad part
SMF Supporter
Joined
Apr 28, 2018
Messages
10,784
Points
113
First Name
Jakko
Really? I’ve not even started about 75 vs. 76 vs. 105 mm gun variants, vertical vs. horizontal volute spring suspension, the different types of final drive housings, split-hatch vs. vision cupolas, inboard vs. outboard lifting rings … :smiling3:
 

Jakko

Way past the mad part
SMF Supporter
Joined
Apr 28, 2018
Messages
10,784
Points
113
First Name
Jakko
As you may have seen in the Latest Acquisitions thread, I got the kit in the mail today. As the box front can be seen above, let’s proceed to what’s inside. The box is one of those slightly annoying side-opening ones, but luckily, inside is a brown cardboard box with a lid:

04FD1581-9A4F-49B0-9A39-FC1C2097C327.jpeg

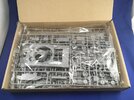
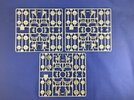
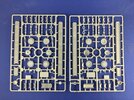
I think I will have to cut that lid off, though, so it doesn’t get in the way when I use the box to hold the sprues. But that is far better than having only a side-opening box (Revell, are you reading this?). All of the sprues, except the clear one, are packed in a single plastic bag — they’re not individually wrapped, but that doesn’t particularly bother me. All in all, you get these sprues in the kit:

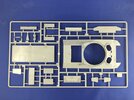
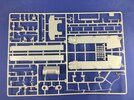
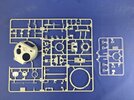
FB044248-C916-4959-86C6-7C57FCC4CECE.jpeg03414F70-730D-41A4-BAD0-7024F4FFEB76.jpegB63A7649-D50D-4BE9-AA8A-BDFD5661604B.jpegD8E3AB02-40B7-4626-A8AF-A662758E58AC.jpeg9B83639F-57BC-4D71-A10F-A673A3F96CB1.jpeg

You get two sets of roadwheels, one of the “pressed spoke” variety and the other the concave type. Similarly, the kit includes two styles of drive sprocket rings, one with a circular cut-out and another with the multi-pointed cut-out. The tracks are T49 type with three bars on the outside of each link, and are supplied as link-and-length, which I think has never been done before on a 1:35 Sherman kit, but is to be applauded over separate-link tracks, if you ask me. The kit also has both the two-part commander’s hatch and the later vision cupola, meaning you can also build a later-production version from it if you want.

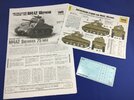
There is also some paperwork, of course:

1B397B8B-CB39-4C82-BADA-58733CAD5BDD.jpeg

The instructions (which can be found on Scalemates) are surprisingly short. Markings are provided for a couple of Red Army tanks and a couple of American (USMC) ones; I don’t know yet which ones I will use, or if I’ll go for something else entirely.

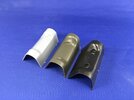
The kit is known to have a few problems, chiefly the final drive housing (nose), the pressed-spoke wheels and the loader’s hatch, say my (sparse) research before buying the kit. Compare these three housings:

BE004132-CB59-4A62-ACE9-D74D4DF89D81.jpegB3ECB4AA-A59C-4919-A736-3545569713CE.jpeg

The grey one is from this kit, the medium green one is Asuka and the dark green is Italeri. However, note that the Asuka and Italeri parts represent different versions: the Asuka one is the round-nosed variety, while Italeri’s is sharp-nosed — this is because it was found that the original, round type was vulnerable to being shot through its forward part, so that was thickened by making the nose sharper.

The Zvezda part seems to represent the round-nosed housing, which it should is wrong for this type of Sherman, going by the New Testament of the Sherman Bible (that is, Son of Sherman :smiling3: — the Old Testament would be Hunnicutt). However, its shape seems to be a little off compared to the Asuka part, which is pretty much spot-on as far as I know.

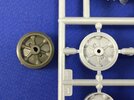
The spokes in the wheels are a bit anaemic, as shown by comparison to the very good Asuka ones again:

7FC31F81-A55B-4CDA-B64F-A9FC66A35AC0.jpeg

I want to replace the Zvezda wheels by Asuka parts, but I just counted them and I only have ten of these, when the tank needs twelve :sad: I may have to go find photos of Soviet M4A2s with different styles of roadwheel …
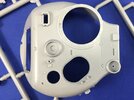
The loader’s hatch is a separate part, which is very good, but it may be off a little in angle:

7E106197-3419-4EEB-8E38-2A594840A308.jpeg

I’ll have to compare it to drawings to see if it’s really wrong, and if so, if it’s wrong enough to want to fix it :smiling3:

One thing I find a little odd about this kit’s design, is that Zezda doesn’t appear to have made it overly modular. The basic shape of the hull, for example, could have been used to release an M4 and/or M4A3 later on if they had moulded the whole engine deck separately, instead of only the grilles. As it is now, they would need to make a whole new sprue to do that, rather than add a few parts.
 
Last edited:

Tim Marlow

Little blokes aficionado
SMF Supporter
Joined
Apr 27, 2018
Messages
16,774
Points
113
Location
Somerset
First Name
Tim
Interesting stuff as usual Jakko. Sherman’s do seem to be a bit of a minefield for the unwary , but then I suppose every well researched vehicle is like that, especially if it’s long lived and built in many facilities.
 

JR

Member of the Rabble and Pyromania Consultant
SMF Supporter
Joined
May 26, 2015
Messages
17,275
Points
113
Location
lincs
First Name
John
Oh please do it in Russian colours.
Have you given us enough information yet ,I feel there is some lacking ;)
Joking apart a nicely detailed introduction. Will be watching closely.
 

Jakko

Way past the mad part
SMF Supporter
Joined
Apr 28, 2018
Messages
10,784
Points
113
First Name
Jakko
Sherman’s do seem to be a bit of a minefield for the unwary , but then I suppose every well researched vehicle is like that, especially if it’s long lived and built in many facilities.
Yes, there are so many small differences that the real die-hard Shermanoholics probably know by heart … I’ve got my knowledge mainly from Son of Sherman and the Sherman Minutia Website — if you want a lot of detail on Shermans but can’t obtain the former, then the latter is a pretty good substitute, though the best bit is that the two don’t fully overlap.

TBH, all this detailed knowledge is the modeller’s bane in some ways … I mean, thirty years ago nobody would have cared whether or not the kit had moulded a little plate under the rear lifting eyes (look closely at the picture of the sprue with the upper hull) or if the bogies had upswept or “flat” return roller brackets — but now, we know that that little plate should be there, and that upswept brackets are only correct from about 1944 on :smiling3:

Oh please do it in Russian colours.
It will be in olive drab, because all the Russians did was add tactical markings to the tanks as they were delivered. In many photos of later 76 mm-armed Shermans, you can still see the shipping stencils that they didn’t even remove or overpaint …

Have you given us enough information yet ,I feel there is some lacking ;)
Oh, there is quite a lot of detail that I still haven’t mentioned, but may when I get round to the relevant part of construction :smiling3:
 
Last edited:

Jim R

SMF Supporter
Joined
Apr 27, 2018
Messages
13,719
Points
113
Location
Shropshire
First Name
Jim
TBH, all this detailed knowledge is the modeller’s bane in some ways …
Very true. For many a recognisable model is fine. Others want total accuracy. Every modeller falls somewhere along that continuum. What really annoys me are those who cannot see any position except their own. Luckily this forum accepts and appreciates the whole range.
As for the wheels - am I right in thinking that many Sherman's ended up with a mix of wheels due to repairs etc.
Jim
 

Jakko

Way past the mad part
SMF Supporter
Joined
Apr 28, 2018
Messages
10,784
Points
113
First Name
Jakko
Very true. For many a recognisable model is fine. Others want total accuracy. Every modeller falls somewhere along that continuum.
I think that modellers who accumulate more references on things that interest them, frequently move from the “generic model” end of that spectrum towards the ”total accuracy” end — simply because once you know that a certain detail is only correct for certain versions, you begin paying attention to it :smiling3:

As for the wheels - am I right in thinking that many Sherman's ended up with a mix of wheels due to repairs etc.
Yes, that happened quite frequently, but pictures of Russian Shermans — or, I should say, Emchas, from the Russian pronunciation of “M4”, эмча, seem to show almost universally one type of wheel per tank. I think I’ll replace the kit ones by spoked wheels, since there are photos of large-hatch, dry M4A2 tanks with those wheels — just none that I found in Russian service yet :smiling3: However, Sherman expert Joe DeMarco mentions that production of this variant at Fisher Tank Arsenal:—
seems to have used just about every type of road wheel on the Shermans it produced in 1944. In the early months, units were equipped with either the welded spoke (A) or pressed spoke wheels (B).
(scroll about halfway down the page I linked to until you see photos of Sherman roadwheels). That makes me think it would not be absolutely wrong to stick the spoked wheels on instead :smiling3:
 

Jakko

Way past the mad part
SMF Supporter
Joined
Apr 28, 2018
Messages
10,784
Points
113
First Name
Jakko
A start has been made:

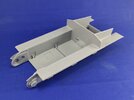
690651B6-8F7E-4702-8533-2DEDAB849F4C.jpeg

Zvezda would have you begin with the turret and then they want you to fit the whole suspension before the sponson bottoms, neither of which makes much sense to me from a construction perspective. So, I built the lower hull with sponson floors first, dry-fitting the upper hull to ensure everything is lined up correctly. Fit is very good, though, and notice the little triangular braces between the floor and the side wall, which make it much easier to get them square than on some other Sherman kits whose lower hull is built up from separate plates,

For the nose, I intend to use the Italeri part, but though it fits very well width-wise, it sits too far forward:

F4EEFE2A-332C-41CC-BAE6-0E4697BC2940.jpeg

This is because it’s too long on the bottom:

362183C4-E0D8-4E27-95B7-A8C5E7785E97.jpeg

The reason there, is because on the real tank the final drive housing was attached by a series of bolts all around — bottom, sides and top — and Zvezda has moulded the bolts as part of the lower hull while Italeri made the housing part long enough that it would have included the bolts had they not been omitted. The solution should be simple enough: cut down the Italeri part to fit, because if you push it over the bolts, the front ends up where it should be. This will be out of sight anyway, so it doesn’t even have to be done very neatly :smiling3:
 

Jakko

Way past the mad part
SMF Supporter
Joined
Apr 28, 2018
Messages
10,784
Points
113
First Name
Jakko
The work on the underside is easy enough: put the Italeri part against the Zvezda hull so that it overlaps the bolt strip and the front sits against the forward curve of the hull, then just score a line on the inside of it with a knife, along the Zvezda hull, and cut there.

The top is slightly more difficult, because Zvezda for some reason moulded a small part of the final drive housing onto the bolt strip, rather than have only the bolt strip as a separate part. I put the two housings next to each other:

B09BFB2A-BC06-43AD-A8F8-FCEA225B9E88.jpeg

and used the Zvezda part to mark how much to remove from the Italeri one. Just nick the latter with a knife on both sides, so you can connect them on the inside and cut through using a knife and a steel ruler.

The tricker part is that the Zvezda housing has a slight notch on each side that corresponds to a widening of the hull sides, which the Italeri part doesn’t, so you need to file away at it until it does fit the hull. It’s easy to check: put the two parts on top of each other and you can again score with a knife to indicate what to remove, and then just file away. Fit the parts occasionally, and you’ll know you’ve gotten far enough if the housing goes nicely between the lower hull sides while the upper hull is also fitted. If the housing is still too wide, it will push the sides out and the upper hull won’t go on neatly at the front.

Eventually, that gives you this:

9F3E2C38-AFC7-4A17-9419-42C222F5BF98.jpeg

The bolt strip needs a little flange cut off on its underside, as that is intended to fit a recess in the Zvezda part that the Italeri one obviously doesn’t have, but that’s all that still needed to be done.

All the parts are still loose here, as I want to apply some texture to the housing before I fit it. I think I’ll glue the bolt strip to the housing first, with a bit of plastic card behind it, so I can putty the joint at the same time.
 

JR

Member of the Rabble and Pyromania Consultant
SMF Supporter
Joined
May 26, 2015
Messages
17,275
Points
113
Location
lincs
First Name
John
Nice alterations there , sure you'll make a good job of it .
 

Jakko

Way past the mad part
SMF Supporter
Joined
Apr 28, 2018
Messages
10,784
Points
113
First Name
Jakko
Thanks. I’ve been investigating some of the other supposed problems of this kit, and I can report that the loader’s hatch is perfectly fine as it is, so that’s one less worry at least :smiling3:
 
Top