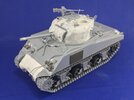
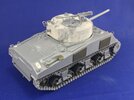
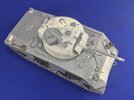
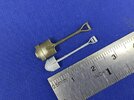
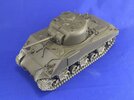
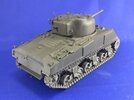
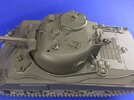
Jakko’s Zvezda M4A2 Шерман, 1:35 scale

Jakko

Way past the mad part
SMF Supporter
Joined
Apr 28, 2018
Messages
10,789
Points
113
First Name
Jakko
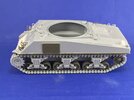
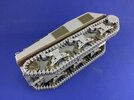
The tracks are link-and-length, which makes them far easier to assemble than most Sherman tracks in hard plastic, but their detail is about the same as those. They also have some links and end connectors moulded at an angle to ensure the track looks good where it bends around wheels, and the top run is a little wavy so it hangs over the return rollers and skids. Though there are ejector pin marks on the insides of some links, these are easy to clean up with a little scraping. Then it’s just a matter of glueing them to the model per the instructions:
F9A36968-985B-48CF-B186-9C427ACDC9AE.jpeg6E29BDBD-D2CE-401D-930C-4BDC767BF863.jpeg

Well, mostly. Zvezda tells you to put five links around the drive sprocket, but I found the track sits better if you use only four, and out the fifth at the very front of the bottom run, so between part E19 (the short stretch between sprocket and first road wheel) and E3 (the bottom run).

Oh yeah, fit the sprockets to the hull before adding the track to them. The sprockets have locating pins that only allow them to go in one position, probably to ensure that the tracks fit correctly.

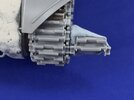
Oddly, I had one link left, which is very strange because both sides would need the same number and the kit provides no spares, but both tracks look fine so all is well. That spare link does come in handy to more easily show a small problem with the tracks:
4C3AED56-FC62-44E7-B6B8-287ADD148AC4.jpeg

They’re on backwards … This is the T49 type of track, which is made entirely of steel (aside from rubber track-pin bushings inside the links) and has one wide and two narrow bars per link. As normally installed, the wide bar should be at the bottom of the link at the front of the tank, but Zvezda has it at the top. This would not be impossible, because these tracks can be (and sometimes were) installed the wrong way round on the real tank, but you can’t fix it on the model because of the undulating top run. That won’t fit properly if you reverse it, even though all the other track parts can simply be put on back to front.
 

Jim R

SMF Supporter
Joined
Apr 27, 2018
Messages
13,724
Points
113
Location
Shropshire
First Name
Jim
Hi Jakko
Great stuff as usual. Replacing parts with more accurate parts from another kit helps with accuracy but often throws up problems to solve - like the axle holes :thinking:
The track on the wrong way - common with models, even at shows and whenever it is mentioned a reference photo is found to show it happened in reality.
Jim
 

Jakko

Way past the mad part
SMF Supporter
Joined
Apr 28, 2018
Messages
10,789
Points
113
First Name
Jakko
Replacing parts with more accurate parts from another kit helps with accuracy but often throws up problems to solve - like the axle holes :thinking:
You would almost think all these different manufacturers don’t take each other’s parts into account when designing a kit … ;)

The track on the wrong way - common with models, even at shows and whenever it is mentioned a reference photo is found to show it happened in reality.
It certainly happened in the real world, with all kinds of vehicles, but to release a model that has it as standard is, IMHO, sloppy …
 

Jakko

Way past the mad part
SMF Supporter
Joined
Apr 28, 2018
Messages
10,789
Points
113
First Name
Jakko
Agreed, and it occurred to me the other day that this kit would have been a pretty good substitute for buying a set of separate-link tracks for some other Sherman — I mean, it costs less than some of those and you get a bunch of other useful parts as a bonus — if only the tracks had been the right way round :sad:

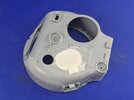
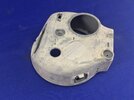
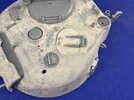
As I said before, the major problem with this kit is the turret. I already corrected the shape reasonably well, but I still had the hatch to sort out. The problem for making it closed is that the loader’s hatch lays pretty much flush with the roof, so you kind of need to scribe its outline — but doing that neatly is not within my skill, I think. Luckily, I hit on another solution.

First, I filled in the hatch opening with plastic card and putty:

9600BA47-7F2D-49CE-A2C6-822FD5191A50.jpeg

Just some card cut to approximately the hatch shape, so it fits inside, and some more card underneath to strengthen it (mainly because of the sanding needed on the putty). I also cut out the hinge from the turret, so I could replace it later rather than scratchbuild a new one, and filled the resulting opening at the same time, of course.

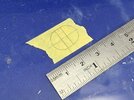
The next step was to make a piece of masking tape to the shape and size of the hatch, and stick it in the correct location:

6FC214E0-DCAB-49C7-B8DB-9086D3723CBF.jpegC6722609-FB56-4FB0-92B7-42B443719F26.jpeg

The hatch is a very simple shape: just two half-circles of 12 mm, connected by a rectangle of 4 mm wide between them. If you’re unsure how to draw it, just draw a line, then two more at right angles to it and 4 mm apart. Take a circle template, centre the 12 mm hole on those transverse lines and draw a semicircle.

With the tape on the turret, I mixed putty from a tube with the solvent I glue my models with, then applied it all over the turret with an old, stiff brush:

D4DD925F-B5F5-4C38-A967-08ADA2846672.jpeg

Trying to avoid brush strokes and adding a stippled texture with the brush before the putty dried, to give a cast texture all over. Once the putty had dried, I sanded it to tone down the texture again, because just stippling is far too coarse and rough. After that, I took off the tape to leave a hatch-shaped depression:

492F75D9-C825-42DD-B98F-8F09620F2C46.jpeg

I had hoped this was enough, but it doesn’t look like a hatch — it looks like an area machined flat in the casting. So I drew another hatch, but now on very thin plastic card, with an 11 mm template instead of 12 mm and with a sharp needle rather than a pencil. That last bit was to make it larger than a pencilled hatch would have been. After cutting it out, I glued it to the turret as the hatch, then cut off the hinge and springs from the kit hatch and glued them to it as well:

9E8F8954-99DB-40BA-958F-3FB63916E044.jpeg

Removing the hinge and springs is not that hard: saw alongside both sides of the spring, then carefully slice off the thickness of the turret that is still attached to the springs. The part of the hinge that was on the turret, I filed down by pressing it with my finger against a file and moving it back and forth until the thickness of the turret had been removed.

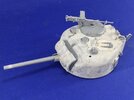
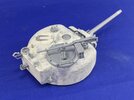
The photo above is of the completed turret, with everything else in place as well. Here is what it looks like in total:

CFCA1D31-D8B8-4CEF-A383-6F4AAC37A05E.jpeg01E82A2D-60A2-4391-97FB-050485156A29.jpeg

The machine gun is in its stowed position, for which I had to slightly modify the clip on the rear of the hatch. The gun is still loose for painting.

Slightly odd is that Zvezda has moulded a little lug on the underside of the commander’s cupola ring, so that it will only fit with the machine gun pintle at 12 o’clock. On the real tank, the cupola can rotate 360 degrees, so I cut off the lug and turned the cupola to the side a bit, for interest.

And then, the build seems to be complete:

D3C037CA-6BBA-4075-8C42-8120D9E443DA.jpeg91155F7A-1F22-4838-9B14-E4AE1CEFF565.jpeg65DE4469-8CB0-4647-891D-F4BEE6674D95.jpeg

Except that I realised right after taking these photos, that I still need to add the straps that hold the tools on the tank.

Oh yeah, and I replaced the shovel by one from the spares box, for this reason:

36C18DD1-9837-43D2-9666-A5209D78CC88.jpeg
 

Jakko

Way past the mad part
SMF Supporter
Joined
Apr 28, 2018
Messages
10,789
Points
113
First Name
Jakko
After finishing a few little details, I sprayed the model in its base colours yesterday:

BA9187FD-1DCE-4892-B26C-436F070C13BC.jpeg4DCE1BF4-DAEF-4A3D-9954-1BD2419DB550.jpeg

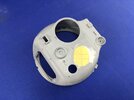
The top is Vallejo olive drab, the lower hull and suspension are their US sand, because I want the model to appear as being very dusty so a coat of a sand colour over nearly the whole bottom half of the hull is a good start.

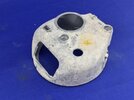
I’m really pleased with the texture on the transmission housing and the turret: applying putty and then sanding it is a method I’ll be using in future.

0924CD3F-B160-4E29-9540-76DE615BC9CA.jpeg

The replacement loader’s hatch also came out well, I think,
 

Jim R

SMF Supporter
Joined
Apr 27, 2018
Messages
13,724
Points
113
Location
Shropshire
First Name
Jim
Hi Jakko
Repositioning the hatch has worked well. Very thoughtfully done. Turret texture is nice, very easy to overdo it. Sounds a good idea to spray the lower parts a sandy base ready for weathering.
Jim
 

Lee Drennen

Box Stock Builder with a Twist/ Rabble Member
SMF Supporter
Joined
Apr 29, 2018
Messages
5,642
Points
113
Location
Wortham Mo
First Name
Lee
Jakko your updates look very impressive as always and the base coats of paint look nice your moving right along on this project.
 

Jakko

Way past the mad part
SMF Supporter
Joined
Apr 28, 2018
Messages
10,789
Points
113
First Name
Jakko
Thanks, though it looks like more work than it actually was, I would say. The hatch was the most difficult bit, but I spent far longer thinking about how best to do it, than building what I came up with :smiling3:
 

Jakko

Way past the mad part
SMF Supporter
Joined
Apr 28, 2018
Messages
10,789
Points
113
First Name
Jakko
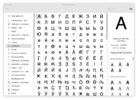
For just a few? I use the emoji and symbols window:

Emojis en symbolen.png

which, on a Mac, you can open from the bottom of the Edit menu, or by pressing the Fn+E keys. (Screenshot in Dutch because I was too lazy to quit and restart my browser in order to switch languages so I could have it in English :smiling3:)

If you need them more than that, installing a Cyrillic keyboard (for Bulgarian, Russian, Ukrainian etc.) layout is going to be more useful, then just switch to that when you need it, probably switching on the on-screen keyboard to help:

Cyrillisch toetsenbord.png

No idea how to get the equivalents for either of the above in Windows or popular flavours of Linux desktops, but I’m sure they’ve got them :smiling3: Just search for something like onscreen keyboard Windows, I suppose.

On a phone or tablet, just use the second method: go into the preferences and add a keyboard for a language that uses Cyrillic.

Another alternative method is to go to something like this page to select, copy and paste the letters you need.
 
Top