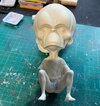
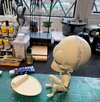
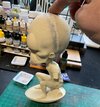
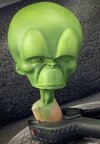
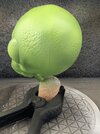
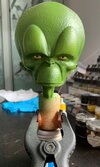
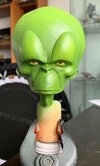
Langy's 'The Mekon', 1/16 scale figure by Mooncrest models.

langy71

SMF Supporter
Joined
Apr 27, 2018
Messages
1,568
Points
113
Location
Nottingham
First Name
Chris
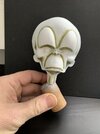
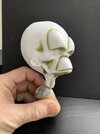
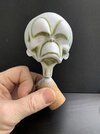
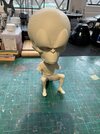
A bit more work done, he's now built as far as I can without painting, still a couple of seams to have a tickle at but nothing scary,

spent a couple of hours this morning 'pinning' the parts so they won't have to rely on just 'glue' to hold everything...(thanks god for nails and an old coat hanger) , the head is still fully removable at this point...and won't be glued in place until all the paintwork is done...

any hoo...
IMG_7993.jpg

IMG_7995.jpg

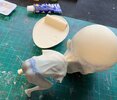
Still working on this seam.. and I had a tiny bit of resin break off the shirt sleeve, what's best to replace it with ? Milliput ?
IMG_7996.jpg

IMG_7994.jpg

A quick 'mock up'

IMG_7997.jpg

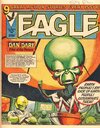
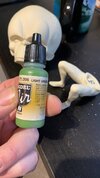
Also came up with a potential colour for him, this looks about the same 'tone' as the images in the Eagle comic I used to read as a young'un
32ED732C-F52E-402C-B5BD-9BAE971DE973.JPG

2f15ffe2710fe090087f3f52f4a1694f.jpg

EAGLE 25MAY84.jpg
 

Mini Me

SMF Supporter
Joined
Jun 1, 2018
Messages
10,162
Points
113
First Name
Rick
Milliput would probably be the strongest for that busted shirt sleeve Chris, if you have room inside , you might want to back it up with a thin strip of styrene supper glued in place. looks good so far. :thumb2:
 

PaulinKendal

SMF Supporter
Joined
Jul 13, 2021
Messages
1,078
Points
113
Location
The Lake District
First Name
Paul
Also, I've potentially come up with a plan for replacing the 'lost' texture, I'm gonna have a crack at laying a cellulose sponge on the fresh putty..hopefully when pressed down it may transfer the 'bubble' texture across...
Have you tried this yet, Chris? Did it work?

As an alternative, you could try mimicking the texture in paint - that'll depend on the paint treatment you decide on for the skin as a whole.

Or you could sand away the texture on the back of the head, creating a transition towards the textured front half so it looks like a natural variation rather than an obvious band of smooth skin. There's certainly no requirement for the whole head (or indeed any of the head) to be textured, looking at original artwork, which shows him to have a smooth bonce.

I agree with Rick (@Mini Me ), that Milliput is your best bet to repair the sleeve. You might want to leave it until the arm is attached. The arm itself may give you the necessary support for the repair, and it'll ensure the arm/sleeve connection isn't compromised by your fix.

Looking good so far, for sure.
 

adt70hk

I know its a bit sad but I like quickbuild kits!!!
SMF Supporter
Joined
Sep 4, 2019
Messages
9,526
Points
113
First Name
Andrew
And we're off the blocks.... (despite saying to Mrs L I was going to wash my car...lol),

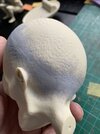
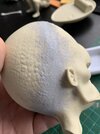
just the head and legs joined, but working on the join lines...(the pencil marks on the head)....although they're not that bad at all.. anybody got an idea for 'replacing /creating the skin texture on the head where I've sanded bits away ?

I can see a trip to my local hobby shop for green paints in my near future....

View attachment 475809

I've seen heavy grain (500) Mr surfacer used to create casting effects.....slap it on with a brush and then stippled as desired.

ATB.

Andrew
 

langy71

SMF Supporter
Joined
Apr 27, 2018
Messages
1,568
Points
113
Location
Nottingham
First Name
Chris
Had a play at creating the missing skin texture with some mr surfacer 500 I found in the shed..(god knows when or why i bought it, but it's still useable), but it looks ok...ish, gonna give it a gentle rub down with some 1500 grit to whip off the 'sharp' bits when it's dried..

IMG_8003.jpg

IMG_8002.jpg
 

Jakko

Way past the mad part
SMF Supporter
Joined
Apr 28, 2018
Messages
10,972
Points
113
First Name
Jakko
Hmm … I must say that I think you’ll keep seeing this because instead of a smooth area, you’ve now got a stippled texture around his head. Which is an improvement, but what it really needs is “islands” of texture — how to easily make those, though, is the question …
 

Tim Marlow

Little blokes aficionado
SMF Supporter
Joined
Apr 27, 2018
Messages
16,904
Points
113
Location
Somerset
First Name
Tim
Hmm … I must say that I think you’ll keep seeing this because instead of a smooth area, you’ve now got a stippled texture around his head. Which is an improvement, but what it really needs is “islands” of texture — how to easily make those, though, is the question …
Actually, I think those islands look like they were made by the holes in a bath sponge? Food for thought perhaps……
 

Jakko

Way past the mad part
SMF Supporter
Joined
Apr 28, 2018
Messages
10,972
Points
113
First Name
Jakko
Actually, I think those islands look like they were made by the holes in a bath sponge? Food for thought perhaps……
Ooh, good thought! Certainly worth a try by just spreading some Mr. Surfacer or thinned filler putty on a piece of plastic card or something, and giving it a go with your best bath sponge :smiling3:
 

Mr Bowcat

SMF Supporter
Joined
Dec 29, 2016
Messages
3,658
Points
113
Location
London
First Name
Bob
Hi Chris, not specifically, but if you search North of the Border on You Tube he had loads of videos, I think his latest one used this technique, but if not he uses it fairly often, and his videos are quite enjoyable.
 

langy71

SMF Supporter
Joined
Apr 27, 2018
Messages
1,568
Points
113
Location
Nottingham
First Name
Chris
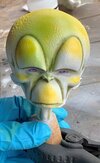
And I figured why not throw some colour at him,

Firstly a splash of RLM yellow to help with highlighting.
IMG_8011.jpg

IMG_8012.jpg

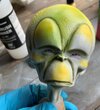
And onto the Vallejo Chrome Green... worked better than I thought it would..

IMG_8013.jpg

IMG_8014.jpg

Managed to hide the tiny seam line I forgot to correct...

IMG_8015.jpg

finally a bit of work on his eyes..

IMG_8016.jpg

IMG_8017.jpg
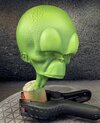
Still looks 'glossy' as it's covered in a satin varnish.....to protect the paint a bit....
I may throw a thin wash of darker green on it yet...haven't made my mind up on that...
 
Top