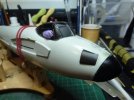
Pete's 1/32 Revell Mosquito

stillp

SMF Supporter
Joined
Nov 17, 2016
Messages
7,247
Points
113
Location
Rugby
First Name
Pete
Cleaning up the crew is an ongoing task, as the underlying paint is starting to soften, so I spent some time giving them a way to enter and exit the cockpit:
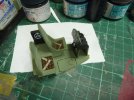
P1170272.JPG
Looks a lot less ragged in real life. The 1:1 hatch is plywood into a plywood floor, so wouldn't look that much better (that's my excuse anyway).
I'll need to give the whole cockpit a wash - not Vallejo - probably Flory Dark Dirt.
Pete
 

stillp

SMF Supporter
Joined
Nov 17, 2016
Messages
7,247
Points
113
Location
Rugby
First Name
Pete
It’s not gone off Pete, that is how it’s supposed to be. It is a shade and varnish coat for gaming figures, designed to make them quicker to paint. The idea is that you block paint the various areas on the figure, then dip the whole figure in the pot, shake off the excess, stand it up, and let it dry…….you should end up with shading (like a pin wash) and a finishing varnish in one go. That’s the theory anyway. It started with gamers using coloured varnishes to get the effect, then the hobby paint companies started doing their own. To be honest, Vallejo are very late to the market with this one. Companies like Army Painter and Citadel have been making them for years. Personally I dislike the effect so have never used it.
Tim, it's too thick for that, you can't shake off the excess.
Pete
 

stillp

SMF Supporter
Joined
Nov 17, 2016
Messages
7,247
Points
113
Location
Rugby
First Name
Pete
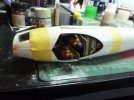
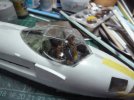
I was quite pleased with my additions to the cockpit sides.. but I wanted to leave the navigator out until I'd joined the fuselage sides, so I could manipulate the battery,radio shelf behind the cockpit into place. I suppose I should have foreseen that the nav wouldn't fit in afterwards. So, popped off the instruments I'd added on the RH side, and just managed to squeeze the nav in, with a good splodge of glue under his bum. When that's dried I'll try to reinstate my additions.
P1170274.JPG
It's a bit cramped in there.
Same on my bench - running out of space!
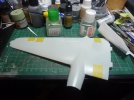
P1170276.JPG
Both wings are now glued up.
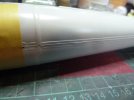
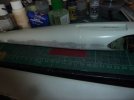
I'm not sure what Revell were trying to represent with this double line along the fuselage seam:
P1170275.JPG
As far as I could see at the museum, there's nothing more than a strip of tape over the join between the L and R fuselage halves, so that double ridge is going to be sanded off. The join will need a bit of filling and sanding anyway.
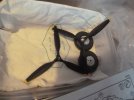
Props and wheels are painted:
P1170277.JPG
Pete
 

The Smythe Meister

Born to be WILD....... until about 9pm
SMF Supporter
Joined
Jan 30, 2019
Messages
5,837
Points
113
Location
Devon
First Name
Andy
Loving the aircrew in there Pete :smiling3:
A great touch... And they add to it tremendously:smiling3:
Cracking stuff mate.... Loving it!!
Andy
 

Jim R

SMF Supporter
Joined
Apr 27, 2018
Messages
13,914
Points
113
Location
Shropshire
First Name
Jim
At least the crew is in. They look good. The lines along the top are odd.
Jim
 

stillp

SMF Supporter
Joined
Nov 17, 2016
Messages
7,247
Points
113
Location
Rugby
First Name
Pete
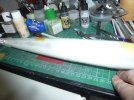
I can't find any evidence of those lines along the fuselage, so they're going to get sanded off, and I've spread some filler on the join.P1170288.JPG
The underside doesn't have that double line but need a lot of filler.
P1170289.JPG
The bomb bay doors don't line up.
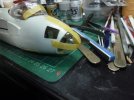
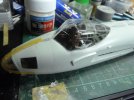
Since I'll be doing a lot of sanding I need to seal up all the openings so it doesn't get full of dust, so the canopy and nose will have to go on. The nose fitted pretty well:
P1170285.JPG
but the canopy doesn't. It's in 3 pieces, two sides + the escape hatch in the roof. The two sides don't match up, one is flatter than the other. I've had to use TET to join them so I expect some repolishing will be necessary. Also the fit between the cockpit sides and the canopy is bad.
P1170287.JPG
I haven't tried to fit the canopy roof (escape hatch) yet, but somehow I'm not expecting an easy fit.
The tail wheel assembly has been wrapped in foil to protect it - I'm not too worried about dust getting in there as there's a bulkhead sealing the tail wheel bay from the rest of the fuselage.
Oh, the joys of ancient Revell kits!
Pete
 

Jim R

SMF Supporter
Joined
Apr 27, 2018
Messages
13,914
Points
113
Location
Shropshire
First Name
Jim
Hi Pete
It sounds as if this kit is fighting you all the way. You seem to be getting there though and when you do eventually end up with a nice model you'll have a great sense of achievement. The canopy looks to need a lot of work.
Jim
 

JR

Member of the Rabble and Pyromania Consultant
SMF Supporter
Joined
May 26, 2015
Messages
17,423
Points
113
Location
lincs
First Name
John
Its a shame your having such a battle with parts of this build Pete. What you've achieved so far is great, love the detail on the panel and the research you've done on that bottle .
 

stillp

SMF Supporter
Joined
Nov 17, 2016
Messages
7,247
Points
113
Location
Rugby
First Name
Pete
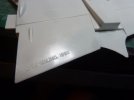
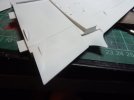
For a break from trying to get the canopy to fit so I can start sanding down the fuselage seam, I stated on the wings, tailplanes, and vertical stab. No major problems with the fit although I'm expecting some with the nacelles.
I thought this was a bit cheeky of Revell though:
P1170291.JPG
Looks better now:
P1170292.JPG
Pete
 

papa 695

Moderator
Staff member
Moderator
SMF Supporter
Joined
May 9, 2011
Messages
20,422
Points
113
Location
Doncaster, South Yorkshire
First Name
Ian
Just caught up on this one Peter, some cracking work on the cockpit. Looks like you’re whipping this into shape.
 

stillp

SMF Supporter
Joined
Nov 17, 2016
Messages
7,247
Points
113
Location
Rugby
First Name
Pete
Well, it ain't pretty but it's on!
P1170293.JPGP1170294.JPG
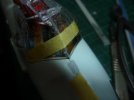
Whatever I did, I couldn't get it to fit any better, so used some 5 minute epoxy to fill the gaps at the same time as sticking the canopy. I managed to get some sticky fingermarks on the canopy while I was at it, but I'm pleased to report that IPA on a cotton bud will remove epoxy fingerprints.
Then I remembered... I had a set of Montex masks!
P1170295.JPG
Those vinyl masks are pretty tough, so should protect against any damage during the many hours of filling and sanding that lie before me.

I think my next build will have to be a Tamiya or a new tool Airfix - one where the parts actually fit together.
Pete
 

Ian M

Administrator
Staff member
Administrator
Moderator
SMF Supporter
Joined
Dec 14, 2008
Messages
19,857
Points
113
Location
Falster, Denmark
First Name
Ian
You got the better of that greenhouse quite nicely Pete.
 

Tim Marlow

Little blokes aficionado
SMF Supporter
Joined
Apr 27, 2018
Messages
16,953
Points
113
Location
Somerset
First Name
Tim
Just evo stick contact some finer stuff on the 180 grit triangle and you’ll be all set Pete….
 

Jim R

SMF Supporter
Joined
Apr 27, 2018
Messages
13,914
Points
113
Location
Shropshire
First Name
Jim
Well Pete despite the issues the canopy is on and masked up. I'm sure it will be fine. You're getting there and that sander is just the tool for a kit like this - as you say "show it whose boss" :tongue-out3:
 

adt70hk

I know its a bit sad but I like quickbuild kits!!!
SMF Supporter
Joined
Sep 4, 2019
Messages
9,554
Points
113
First Name
Andrew
Just had a catch-up Pete. That's been something of a struggle hasn't it but it's looking ok.

ATB.

Andrew
 
Top