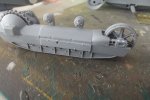
Scotties Miniart US Bulldozer

Wookie2486

SMF Supporter
Joined
Apr 28, 2018
Messages
219
Points
43
First Name
Martyn
Scottie,

The dozer is looking great I had the exact same problems with mine, I'm glad I'm following along.

Marty
 

Mickc1440

SMF Supporter
Joined
Apr 27, 2018
Messages
4,266
Points
113
Location
Sheffield
First Name
Mick
I know I'm late but I was away on holiday :smiling5: great work Scottie, always a pleasure to take a seat on your builds
 

JR

Member of the Rabble and Pyromania Consultant
SMF Supporter
Joined
May 26, 2015
Messages
17,293
Points
113
Location
lincs
First Name
John
Cutting this type of part always cause's problems Paul .
I know you prefer to replace with metal but what If a piece of blue tack, or plasticine was put underneath the part before you attempt to remove .
With thin parts not being thickness of the sprue, that may stop the pressing down which causes the break .

Just an idea ?
 

scottie3158

SMF Supporter
Joined
Apr 27, 2018
Messages
12,729
Points
113
Location
Spalding
First Name
Paul
Scottie,

The dozer is looking great I had the exact same problems with mine, I'm glad I'm following along.

Marty
Marty, thanks mate, I'm glad I'm not the only one.
I know I'm late but I was away on holiday :smiling5: great work Scottie, always a pleasure to take a seat on your builds
Mick, No worries mate, it is really hard to keep up with all the builds going on. You are more than welcome just mind the rabble.
Cutting this type of part always cause's problems Paul .
I know you prefer to replace with metal but what If a piece of blue tack, or plasticine was put underneath the part before you attempt to remove .
With thin parts not being thickness of the sprue, that may stop the pressing down which causes the break .

Just an idea ?
John, The Miniart plastic doesn't help. It is worth a punt with the blue tack I will have to give it a go.
Hang in there Scottie.......you are too heavily invested to bin it now. :thumb2:
Hi Rick, I will keep chipping away, modelling is no fun if it's to easy ;)
 

scottie3158

SMF Supporter
Joined
Apr 27, 2018
Messages
12,729
Points
113
Location
Spalding
First Name
Paul
One sponson has been built and it was fiddly. On the other side I will probably leave all the internal details as they take a lot of cleaning up they are difficult to line up and they cannot be seen when all the covers are in place.

DSCF3436.JPG

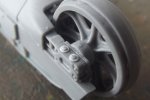
The idler has not been glued in place, this allows it to be slid backwards or forwards to get the tension on the tracks correct. The bolt detail was removed and replaced with punched sheet/pewter as it had a seam running through the centre.

DSCF3437.JPG

cheers
Scottie
 

Jim R

SMF Supporter
Joined
Apr 27, 2018
Messages
13,758
Points
113
Location
Shropshire
First Name
Jim
It might have been fiddly, Scottie, but looks neat and well detailed so worth the effort. The other side will be easier - experience and no innards to fit. :thumb2:
 

scottie3158

SMF Supporter
Joined
Apr 27, 2018
Messages
12,729
Points
113
Location
Spalding
First Name
Paul
It might have been fiddly, Scottie, but looks neat and well detailed so worth the effort. The other side will be easier - experience and no innards to fit. :thumb2:
Cheers Jim, the details under the covers are very good but can't be seen for example there are two springs an inner and outer the inner can't be seen inside the outer then neither can be seen when all assembled.

That looks splendid Scottie. Miniart kits deserve better plastic I think.
Tim, you are so right the detail that they offer is superb but the little parts are very very brittle and difficult to clean up.
 

Graeme C.

SMF Supporter
Joined
Apr 29, 2018
Messages
1,485
Points
113
First Name
Graeme
Looks fiddly, that brittle plastic doesn't help, but your making a good job of it.:thumb2:
 

Lee Drennen

Box Stock Builder with a Twist/ Rabble Member
SMF Supporter
Joined
Apr 29, 2018
Messages
5,699
Points
113
Location
Wortham Mo
First Name
Lee
Scottie keep chipping can’t wait to see the the next updates
 

scottie3158

SMF Supporter
Joined
Apr 27, 2018
Messages
12,729
Points
113
Location
Spalding
First Name
Paul
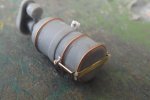
Progress is very slow but kind of satisfying. The air filter was quite well detailed but I felt it could be improved on all the moulded detail was removed, then with some copper wire, pewter, off cuts of evergreen and PE sprue and some punched details i replaced what I had removed in addition the locating strap
DSCF3440.JPG

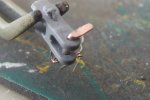
The rear towing pintle was also detailed the moulded pin was removed a hole was drilled in the hook. A new pin was made from copper wire. The pin was flattened one end the other end was drilled to accept the scratched "R" pin this was held in place with a scratched chain. I have lots of PE chain but even when you twist it to give it some depth it doesn't look right.
DSCF3439.JPG

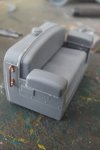
The seat assembly is under way I replaced the plastic grab rail with copper wire. I still have to add the rivet detail.
DSCF3443.JPG

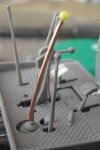
Finally you guessed it I broke another lever so I had to scratch one. Had some fun making this as I had to taper it and flatten it plus add a ball on the end. I think it turned out ok.
DSCF3442.JPG

cheers
Scottie
 

Tim Marlow

Little blokes aficionado
SMF Supporter
Joined
Apr 27, 2018
Messages
16,801
Points
113
Location
Somerset
First Name
Tim
Great work Scottie. What did you use for the ball end on the lever?
 

scottie3158

SMF Supporter
Joined
Apr 27, 2018
Messages
12,729
Points
113
Location
Spalding
First Name
Paul
Amazing work.
Pete
Cheers Pete.
Great work Scottie. What did you use for the ball end on the lever?
Tim, believe it or not I use little hard candy balls used for cake decorating. They are stuck on with CA and when dry dipped in PVA to seal the surface.
 
Top