You are using an out of date browser. It may not display this or other websites correctly.
You should upgrade or use an alternative browser.
You should upgrade or use an alternative browser.
Tamiya 1/32 F-16 (the big box )
- Thread starter Mickc1440
- Start date
Hi Mick. I really wonder why they use screws than using snap-fit joints?Bit more progress today after an early spraying session. Can’t ever remember screwing a model together before. Main wheel bay and engine housing attached to the lower fuselage
View attachment 460677
- Joined
- Apr 28, 2018
- Messages
- 10,832
- Points
- 113
- First Name
- Jakko
Jim R
SMF Supporter
Hi Mick
That engine is definitely a model in itself. Great to see it built. You're right in that it's not worth painting what won't be seen. Screws in a plastic kit, that's a new one on me.
That engine is definitely a model in itself. Great to see it built. You're right in that it's not worth painting what won't be seen. Screws in a plastic kit, that's a new one on me.
Mickc1440
SMF Supporter
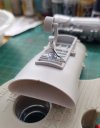
It was definitely too hot today for any spraying so a bit more construction on the front air intake and nose wheel. I've added some hydraulic lines which i need to straighten up but you get the idea. With this weather set to continue until after the weekend plus being on nights not sure what progress I'll make.

Mickc1440
SMF Supporter
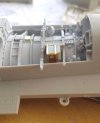
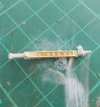
Still too hot to paint and still on nights so had a bit of time at the desk adding some bling I wasn't going to bother with but as you all know when you have time available any bit of modelling will do. I finished assembling the front air intake then added these bits to the main wheel bay and some parts of the front wheel well.


scottie3158
SMF Supporter
Nicely done mate looks good.
Mickc1440
SMF Supporter
Thanks ScottieNicely done mate looks good.
- Joined
- Apr 28, 2018
- Messages
- 6,212
- Points
- 113
- First Name
- Bob
Very nice sir, great progress!
Mickc1440
SMF Supporter
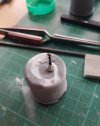
Temperatures back to something more reasonable and paint I was waiting for has arrived. I kept doing little bits of building but didn’t want to rush too far ahead and messing up by doing something out of order. I did however start on the cockpit. This is the first time I’ve ever used 3D decals and am quite impressed with them. I was surprised that in this scale there was very little detail on the joystick, in my 1/48 build there was a piece in the Eduard set to resolve this but not for this one. I checked my go to reference book and had a go, doesn’t look too bad? I got some AM bits on one of the side walls too but enough for now and back to where I left off.
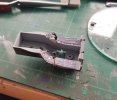
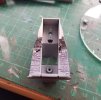
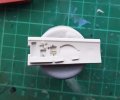


Mickc1440
SMF Supporter
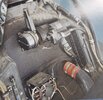
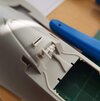
When you buy yourself a real nice book on the aircraft you’re building I’ve started looking at some kit pieces and thinking that could be better. I know we have lots of folk on here who go above and beyond with their builds so I thought as this is a long build then why not. The cockpit area has a lot of visible detail that isn’t included on the moulding so off we go. First up is the canopy opening mechanism. Here are the pics so far. The photo, the part and where I currently am with it. It needs a little finesse and a good dollop of paint. Oh well nothing ventured
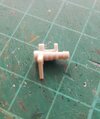
View attachment 461500View attachment 461501View attachment 461502
View attachment 461500View attachment 461501View attachment 461502
Mark1
SMF Supporter
Thats definitely an improvement on the kit part 

Mickc1440
SMF Supporter
Thanks Mark, I’ll add in some wiring somehow as you can see it’s quite prominentThats definitely an improvement on the kit part
scottie3158
SMF Supporter
Mick,
that is a great bit of detailing.
that is a great bit of detailing.
Mickc1440
SMF Supporter
Thanks Scottie, I try to learn from the bestMick,
that is a great bit of detailing.
Mickc1440
SMF Supporter
Thanks JR sometimes you have to try and push yourselfVery nice Mick, nice effort.
Mickc1440
SMF Supporter
Thanks JR sometimes you have to try and push yourselfVery nice Mick, nice effort.

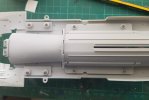
 I’ve seen it on other kits of theirs too, screws where you would expect a glued joint, including some of their old 1:12 motorbike kits, but also on some 135 scale tanks like the M26 Pershing.