Tamiya 1/32 F-16 (the big box )

Mickc1440

SMF Supporter
Joined
Apr 27, 2018
Messages
4,301
Points
113
Location
Sheffield
First Name
Mick
Very nice additions there Mick :smiling3:
Know what you mean about knowing when to stop..... It could end up being a never ending spiral !!
If I keep going it’s never going to get built

lovely details Mick.
Thanks pal, more of your inspiration

I'm afraid any comments from me would be superflous, so I'll just like posts, if that's OK?
Not a problem Karl thanks for having a look

Mick,

Sorry for behind on this. Love the additional touches you've added. That's coming on very nicely indeed. Very well done.

Andrew
Thanks Andrew, hopefully more to follow soon if I can focus
 

Mickc1440

SMF Supporter
Joined
Apr 27, 2018
Messages
4,301
Points
113
Location
Sheffield
First Name
Mick
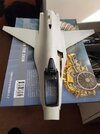
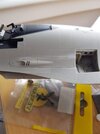
Not much more done but it’s definitely getting bigger. Joined the two halves of the upper fuselage. Bit of dry brushing after spraying the black and added a couple of etch plates, one being the builders plate and a tiny one on the canopy opening motor for effect.
F236462C-3337-47DF-BAC2-5B6B67AA6BC0.jpeg
 

Mickc1440

SMF Supporter
Joined
Apr 27, 2018
Messages
4,301
Points
113
Location
Sheffield
First Name
Mick
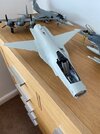
Had half an hour to spare so have joined the upper and lower fuselage. There are a couple of small areas to be filled but overall a really nice fit. I love the way these go together with no top and bottom seam. I put the main undercarriage struts on temporary for the pics, they need some brake lines adding before a permanent fix.
f16 1.jpgf16 2.jpg
 

Mickc1440

SMF Supporter
Joined
Apr 27, 2018
Messages
4,301
Points
113
Location
Sheffield
First Name
Mick

Mickc1440

SMF Supporter
Joined
Apr 27, 2018
Messages
4,301
Points
113
Location
Sheffield
First Name
Mick
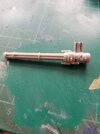
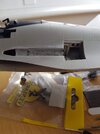
Built up the M61A1 cannon while i still wait for some detailing wire to arrive. It builds up nicely and I added some metal strips to the ammo feed and a couple of plugs and control cables to the breech area. Just a minor gripe now which I found too late to really rectify. I thought the gun and breach part both had removable covers to show it off. Turns out not and only the breach cover is. For some reason the gun tube part stops short leaving a gap as you can see in the pics. When completed only a small section of the barrels are visible when the cover gets glued on which is a shame, but the news from Poland is good, wire is almost here
CEDC46B8-0AA6-467C-AD16-E9DE46EF7714.jpeg
5AD73096-EA04-4A1C-986C-978856355186.jpeg1983CD0D-ADFF-4C3C-8F67-76329101E9DD.jpeg
 

Allen Dewire

Proud Rabble Member
SMF Supporter
Joined
Apr 27, 2018
Messages
4,121
Points
113
Location
Bamberg
First Name
Allen
Fell behind on this fine build Mick, but I'm back for the attack now. Loving the scratchy Sir!!! Isn't it funny, when you reach that magic age, you take a different outlook on what you are building. You look at references and such and decide I want my build to be more detailed. I can make this and scratch that to make it shine...And you have done just that Sir!!! Nice work all around!!!....

Prost
Allen
 

Mickc1440

SMF Supporter
Joined
Apr 27, 2018
Messages
4,301
Points
113
Location
Sheffield
First Name
Mick
Fell behind on this fine build Mick, but I'm back for the attack now. Loving the scratchy Sir!!! Isn't it funny, when you reach that magic age, you take a different outlook on what you are building. You look at references and such and decide I want my build to be more detailed. I can make this and scratch that to make it shine...And you have done just that Sir!!! Nice work all around!!!....

Prost
Allen
Thanks very much Allen. In 1/32 some scratching isn’t so daunting fortunately and add in the great reference book I got and inspiration from the great scratch builders on here including your good self it’s a must to try.
 

boatman

SMF Supporter
Joined
Nov 8, 2018
Messages
13,006
Points
113
Location
NORFOLK UK
First Name
christopher
It's a pleasure to watch you build this Mick. Every step has a bit of wow to it.
ditto FROM me also Mick but its a pity you could not have fitted in tiny hinges so the the vulcan gun can have the hatches open to see it as thats what im goona do on both my big kit when i get round to them
but brilliant work an i'll be followin along
ATB
Chrisb
 

Mickc1440

SMF Supporter
Joined
Apr 27, 2018
Messages
4,301
Points
113
Location
Sheffield
First Name
Mick
It's a pleasure to watch you build this Mick. Every step has a bit of wow to it.
Thanks for those kind words Colin
ditto FROM me also Mick but its a pity you could not have fitted in tiny hinges so the the vulcan gun can have the hatches open to see it as thats what im goona do on both my big kit when i get round to them
but brilliant work an i'll be followin along
ATB
Chrisb
Thanks Chris, the problem with aircraft being that a lot of removable panels don’t hinge they just have multiple screws
 

adt70hk

I know its a bit sad but I like quickbuild kits!!!
SMF Supporter
Joined
Sep 4, 2019
Messages
9,526
Points
113
First Name
Andrew
Coming on beautifully Mick!!

Very well done!

Andrew
 

Mickc1440

SMF Supporter
Joined
Apr 27, 2018
Messages
4,301
Points
113
Location
Sheffield
First Name
Mick
Very short time at the desk today, still working on bits before I can return to the actual build order. Some wing pylons put together then some cockpit work. Couple of wires added to the instrument panel cover as they stand out in the pics then the 3D decals added to the instrument panel. This just needs touching up with paint before fitting. Early shifts now for 3 days so work stops play.
0C1D2BAB-13D8-4BA7-9A06-1EFDC313E273.jpeg6213ACDD-02C5-429A-BDBD-897D216DE479.jpeg
 
Top