Wingnut Wings 1/32 Halberstadt Cl.II (late)

Allen Dewire

Proud Rabble Member
SMF Supporter
Joined
Apr 27, 2018
Messages
4,105
Points
113
Location
Bamberg
First Name
Allen
Greetings from a warm and sunny Bamberg Aerodrome,

Wow, the laptop is still working like a dream, so here I am again.......

Amazing work Allen. You must be very happy. Looking at the details you can see why the kits are expensive.
Thank you Jim! The detail is fantastic, but honestly, you get what you pay for. The original price for this kit was $129 in 2018 and I got her for €149, in 2021 after they had closed up shop and they became collector's items...

Bloody marvellous! Absolutely love the fuel indicator. Never seen that done before.
Much too kind Tim! It was one of the 2 clear plastic parts in the kit. I just painted the underside with some AV Ochre to make it look like old gas. I don't know what color the stuff was way back then, but figured it would look alright...

More amazing wizadry buddy.I must say i found Bitburg was a bit too Holsten pi.. oops i meant Pils hehe.Keep going mate.Id love to see you tackle the Felix!!!!.
Toodle ooo dear boy.
Rich.
Thanks Buddy! Beer from Franken (where I live) is the best in the world. I would love to build the Felixstowe, but I would need to get a bigger apartment to display it Richard. Maybe one day before I go tits up...

The Committee are gathering Dude 1.
There is nothing going on here that would require a gathering of the committee, Dude 2. Just an old fart playing at the table and having a blast too...

Keep it coming Allen...Allen...Allen!.......must be an echo in here :thinking:
You just keep killin' me Rick! Are sure there isn't something in the water where you live Buddy? Maybe kills brain cells or sumpin'...

You can be justifiably proud of your magnificent flying machine Allen, well done. :thumb2:
Thank you so much Noah Garry! I do hope its not too cold for you down under now and please take care of yourself...

Did I hear base and figures?...this is where I come in Allen, indeed a really long catchup read before I could start posting.
You've done a great job having gone through rough patches and all including the 2-0 Footy loss. Yup, Infini is great to work with...used it on all my ship rigging for Kure Harbour. Dig those D-Day stripes on the tail. Obviously one neat and patient build that have had some squirm in their seats thanking that they only will remain single winged builders. But they have to try at least one WNW kit to know how well engineered they are.
Looking forward to seeing those round things go onto those spindly leg attachments for the finish and see you work on the base.

Cheers,
Wabble
Greatly appreciated my friend! I'll admit, I had my doubts about building this one, but I needed to see if I could do it. I have 5 more in the stash and used this one as the guinea pig. My Hansa-Brandenburg W.29 will be my next victim around September. I couldn't believe how easy the Infini rigging was to work with. It was just a beatch trying to thread it through the eyelets with shaky hands sometimes. I can see why you use it, Wabble...No worries about the soccer match. I found it hilarious that they were playing while I was taking pics of my progress to post here. I couldn't resist grabbing a pic to post too...

Wow Allen 'tis truly a thing of beauty, great work
Thank you Sir! I do have to ketchup with your cavalry troops too. The last pic I saw, they had just sliced the robot into pieces and were riding off with big smiles on their faces, into the sunset...

Wonderful stuff Allen!
Thanks Doc M! I have even taken a dive into you and Richard's dark art of fig surgery. I only hope my patient survives the butchery!!!...

This is really an outstanding build.
Thanks too Bro! I think it is finally nearing the end and I can get back to slinging mud around again...

Youngerthanme,
Well you have done it this time, bet even you are amazed it did not finish up on the shelf of doom. What an excellent job you have done. I know WNW kits are good quality, but you have through hard work improved that quality with quality of your own - well done, and I am sure it has inspired a lot of us to dust off those boxes in the stash.
Now can you remove that photo, the one with your full and frothy specimen glass in it....
Prost
Olderthanyou.
Wow Olderthanme, thank you for the kind words! All I can say is, bust out the feather duster's guys, and have at them. Oh, and no worries Mike. the specimen glass didn't last too long being filled...And it was good too!!!...

Just stunning!!
Many thanks Doug! I had to reach deep into my bag tricks to build this one...

I hope you mean that you have a second drive that you make regular (preferably automatic) backups on? Because if you don’t, you will be SOL if that SSD fails.
Oh yea Jakko. I have a home network and my own 3TB cloud for back ups. I also have USB external HDs for my stuff too. He partitioned the SSD into C. and D. drives, with windows on C. and my other files on D. in their folders. I also have a monitor program for the SSD, if it should start to act up or fail at any time. The old Seagate in the laptop was just crap and finally bit the bullet after 8 years. My son is a techi and his job is repairing printers, copiers, maintaining the copy store's 20 computers and working in the store too. He is also heavily involved in the VR scene around the world. He's a good kid...

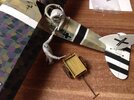
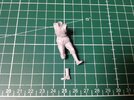
Just a quick pic in honor of Dr. Merryweather and Dr. Wabble and their butchery skills. I took the plunge because Uwe wouldn't fit into the observer's area correctly. He had to go under the saw,
IMG_3734.JPG
A straight clean cut, no blood and he CA'd back to health immediately!!!...Time to play some more................

Once again, a HUGE thank you for the wonderful comments and support on my wing thingy build!!!...

Prost
Allen
 

Allen Dewire

Proud Rabble Member
SMF Supporter
Joined
Apr 27, 2018
Messages
4,105
Points
113
Location
Bamberg
First Name
Allen
It's me again,

Short and sweet tonight and only a pic or maybe more to whet your appetite (for a Pizza, that is),

IMG_3741.JPG
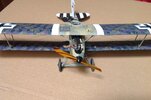
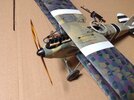
I totally forgot that the wing thingy needed the spinney thing to get off the ground. The kit gave me 5 different ones, so I could practice on 4 to finally get one right. This is the first try and is only base coated. Believe it or not, I brushed this on using Lifecolor's UA 738, Deposited Dust acrylic from their dio series. Flat brush and one coat. Woodgrain attempt in the morn. Now, a teaser or 4,

IMG_3735.JPG
Another,

IMG_3739.JPG
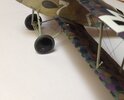
And the wheels and skid all touch the ground too!!!

IMG_3740.JPG
The snake hanging under on the left is the aerial for the wireless set. She's a bit more wobbly with the wheels on. one has to be real careful setting it down. Lastly, the hubcap on the wheel,

IMG_3736.JPG
More play to come and have a good week!!!...

Prost
Allen
 

Waspie

SMF Supporter
Joined
Mar 13, 2023
Messages
2,468
Points
113
Location
Portland - Dorset
First Name
Doug
This has been so educational for me on every level. I never knew about the Halb! Habler!!! What the plane was!! I do now, and learned a lot more to boot!! Looking forward to the end product. :thumb2:
 

Mini Me

SMF Supporter
Joined
Jun 1, 2018
Messages
10,160
Points
113
First Name
Rick
Very Nice Allen...why is there a stub tailed Scorpion attacking the right side of the engine(where the exhaust should be)? ;) Talk about a "snake" pit. And just so you know, not only is JR standing by with the Dog's.....the Bamberg Gazette is planning on running a full page "feature" on Resident Modeler Completes First Wing Thing in 35Years! So gitt'er done! :tongue-out3:
 
Last edited:

Allen Dewire

Proud Rabble Member
SMF Supporter
Joined
Apr 27, 2018
Messages
4,105
Points
113
Location
Bamberg
First Name
Allen
Evening kind people and thank you again for the wonderful support and 'banter' (I still think Mr. Smiff made that word up).......

This has been so educational for me on every level. I never knew about the Halb! Habler!!! What the plane was!! I do now, and learned a lot more to boot!! Looking forward to the end product. :thumb2:
Thanks Doug and glad you are enjoying this. I am sorry, but I forgot to post up the background on the plane earlier as I had said I would. I'll try and do that ASAP Sir...

Very Nice Allen...why is there a stub tailed Scorpion attacking the right side of the engine(where the exhaust should be)? ;) Talk about a "snake" pit. And just so you know, not only is JR standing by with the Dog's.....the Bamberg Gazette is planning on running a full page "feature" on Resident Modeler Completes First Wing Thing in 35Years! So gitt'er done! :tongue-out3:
I really can't tell you where the Scorpion came from Bro! It was on the sprue and in the and destructions, so I thought I had better add it. I never noticed the likeness till you mentioned it Rick. Oh, and this Sir, will be (when done) my third completed wing thingy in 35 years. They're gonna have to correct their feature story a bit...(He-162 and Mossie)...

My gob is well and truly smacked.
Simply stunning.
Wow Ian, thank you so much Sir! You're words are much to kind for my meager attempt at a wing thingy...

Quality build Allen The finishing post is in sight!
Cheers, Paul
Thanks too Paul and I think I can see the finishing post too my friend! Maybe it's just with the optivisor though...LOL!!!....

No update tonight (I hear the big sigh of relief!), as I have been heavily involved in cussing my a$$ off trying to paint a spinney thing for the motor with wood grain on it. I'm on the 4th attempt and it's not looking too bad now. It's amazing how you forget everything about Basic Woodworking 101 when you really need it!!!......

Have a great night folks!!!

Prost
Allen
 

Allen Dewire

Proud Rabble Member
SMF Supporter
Joined
Apr 27, 2018
Messages
4,105
Points
113
Location
Bamberg
First Name
Allen
Evening All,

Not really an update as the propeller nonsense has forced a small pause in my build. I needed to calm down and do something else for a day. Then re-group and try the prop crap tomorrow. I also wasn't in the mood for figs, so I played with the resin ammo cart. That was just what the nerves needed,

IMG_3742.JPG
It's only 6 parts and pretty well cast too. I used AK 11318 RAL7028 dunkelgelb, Vallejo 71.040 burnt umber and Vallejo metal color 77.712 steel applied with some hairy sticks. After it dried, I slobbered an oil wash of brown on it for the wood grain effect. After it all dries overnight, I can CA it together in the morn. With the cart done, we now have to fill it with ordinance,

IMG_3743.JPG
I started painting 20 stick grenades, plus the 10 I had already made, should be enough for the cart. We'll see...
Now I have been trying to paint a spinney with wood grain. I thought the 4th attempt would pass the 10 meter rule. I can't understand why I can't do this pretty simple task. I even went so far and watched a video on Utube, which was a first for me, as I am not a fan of the platform...Anyway, the result of my work,


IMG_3744.JPG
The emoji says it all!!! Some paint even came off while doing a light oil wash on it. It's back to square one and start again with the third kit spinney propeller............

Prost
Allen
 

Mark1

SMF Supporter
Joined
Apr 17, 2021
Messages
3,554
Points
113
Location
South london
First Name
Mark
Hi Allen i hope you or tony or anyone else dosnt mind me posting this here but i thought this was a good prop painting method and you may find it useful not that i doubt you wont get it sorted anyway.
The prop has also been painted. For this I first gave it a coat of grey primer, then a base of buff . This was followed by a rough streaking/ striping with a dark earth colour. Once fully dry a good coat of Tamiya clear orange was quickly brushed on ( Tamiya paints dont like being brushed at the best of times but the clear colours are VERY fast drying so youve got to be quick , generous and not overbrush it ) View attachment 427741View attachment 427742View attachment 427743View attachment 427744View attachment 427745
 

Mini Me

SMF Supporter
Joined
Jun 1, 2018
Messages
10,160
Points
113
First Name
Rick
OK Allen, deep breath and steady the nerves...toss back a Wagner's and all will fall into place. ;)
 

Tim Marlow

Little blokes aficionado
SMF Supporter
Joined
Apr 27, 2018
Messages
16,777
Points
113
Location
Somerset
First Name
Tim
Hi Allen. Don’t give up yet………
The Tamiya clear orange “trick”, pointed out by Mark, is very useful. I knicked it from a series of articles on biplane modelling i read in one of the magazines a few years ago when I was building a 1/48 Nieuport. Personally I’ve sprayed it on, rather than brushing it, myself though. It’s much easier than brushing. It ties the colours together very nicely and actually works great for any varnished wood you need to model. Gives the part a great warm varnish glow. I would also mask the delineation between the colours on the prop. As I understand it, they were of laminate construction and these show the wood joins. Don’t get too hung up on wood grain either. These would have been made from close and straight grained timber for strength, so visible grain would be at a minimum. A buff colour for the light bit and a mid brown for the darker bit, overspray with orange, and Rob’s yer relative :thumb2:
 

Allen Dewire

Proud Rabble Member
SMF Supporter
Joined
Apr 27, 2018
Messages
4,105
Points
113
Location
Bamberg
First Name
Allen
Morn Guys,

All is calm at the Aerodrome and it's a new day...

Hi Allen i hope you or tony or anyone else dosnt mind me posting this here but i thought this was a good prop painting method and you may find it useful not that i doubt you wont get it sorted anyway.
Greatly appreciated Mark, thanks and I don't think Tony would mind. I don't mind at all and feel free to post something here at any time....As long as it's not rude, illegal or fattening!!!...Ok, I can live with the rude part................

OK Allen, deep breath and steady the nerves...toss back a Wagner's and all will fall into place. ;)
Done deal deal Bro!!! A new day and a new outlook on the situation. It's just my wanting it to be correct in my own eyes, Rick. Maybe I should open them once in a while...BTW, do you have 1/87 surfboards to go on the roof rack of your Phänomen???...

Hi Allen. Don’t give up yet………
The Tamiya clear orange “trick”, pointed out by Mark, is very useful. I knicked it from a series of articles on biplane modelling i read in one of the magazines a few years ago when I was building a 1/48 Nieuport. Personally I’ve sprayed it on, rather than brushing it, myself though. It’s much easier than brushing. It ties the colours together very nicely and actually works great for any varnished wood you need to model. Gives the part a great warm varnish glow. I would also mask the delineation between the colours on the prop. As I understand it, they were of laminate construction and these show the wood joins. Don’t get too hung up on wood grain either. These would have been made from close and straight grained timber for strength, so visible grain would be at a minimum. A buff colour for the light bit and a mid brown for the darker bit, overspray with orange, and Rob’s yer relative :thumb2:
Thanks for this Tim. I just sometimes get in too deep trying to do something pretty simple. I researched, studied lots of pics, watched that video and jumped into it. I do seem to forget the KISS method a lot when doing things and make it harder on myself than need be. It must be an old age thing, or old ways die hard type of thing...Must remember, "Keep It Simple Stupid"...........

I'll definitely have to get some Tamiya clear orange. I was looking at mixing some oils, but the results with the clear look so much better. Thank you all once again and have a great weekend with plenty of bench time!!!...

Prost
Allen
 

Allen Dewire

Proud Rabble Member
SMF Supporter
Joined
Apr 27, 2018
Messages
4,105
Points
113
Location
Bamberg
First Name
Allen
Good evening from a warm Bamberg Aerodrome,

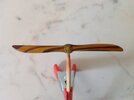
Sorry that I have been absent for a week and have not commented on all the fine builds going on. I needed a little break from the table and have been doing a lot of research and also ordering needed things. I got my order with the Tamiya Clear Orange and wanted to give it a try. The wind didn't want to play along though, until today. I mixed it 60%-40% IPA and gave it a shot,

IMG_3770.JPG
A huge thanks to Mark (for Tony's link), Tony (for doing it) and Tim for his help too!!! I had touched up the prop last week and with the orange overcoat, I'm happy with the result. This was the last headache in finishing the Halberstadt, besides a little weathering. A bit of a teaser or two,

IMG_3772.JPG
I just have to add the 2 Niendorf (prop manufacturer) decals on the blades,

IMG_3773.JPG
Even with taking a break, I couldn't leave everything hanging. I played a bit here and a bit there with the figs, the cart and it's load. I blu tacked the arms on the figs to get the right poses for the dio,

IMG_3767.JPG
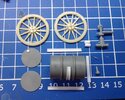
This should do pretty well. I just need to replace the limp stick grenade in the dude's left hand. Oh, and paint the poor blighters too!!!...As I said earlier, during my break doing research, I found a small project to build with some scratchy and stuff from the stash. Aviattic makes a resin kit of it, but being the firm is on the Insel, to order it would cost me about €50, delivered (postage, customs). Wing thingy's need fuel to fly, so I'm half scratching an Esso gas station on wheels,

IMG_3774.JPG
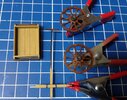
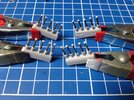
Still a lot to do on it, but I have everything to finish it and the cost was.......NADA!!! A Miniart fuel drum, leftovers from WnW's, Evergreen stuff, punch& die sets and some old resin wagon wheels. I'm loving this little project!!!.....
I have a few more packages with goodies coming this week and yea, there are a couple of kits in one...More later when they arrive.......

Thanks for looking in and please give me a chance to ketchup with all of your fine builds...

Prost
Allen
 

Waspie

SMF Supporter
Joined
Mar 13, 2023
Messages
2,468
Points
113
Location
Portland - Dorset
First Name
Doug
The prop is not a lot different in colour and grain from a small one I have in the loft from a old target aircraft.
 
  • Like
Reactions: JR

yak face

Wossupwidee?
Staff member
Moderator
SMF Supporter
Joined
Jun 13, 2009
Messages
12,400
Points
113
Location
sheffield
First Name
tony
Superb work allen , the prop ( and everything else) looks excellent . Great idea scratching the fuel cart , cheers tony
 

JR

Member of the Rabble and Pyromania Consultant
SMF Supporter
Joined
May 26, 2015
Messages
17,275
Points
113
Location
lincs
First Name
John
My word Dude 1 this is brilliant. Love the poses along with that fuel drum.:thumb2::thumb2::thumb2:
 
Top