Tamiya Wespe 1/35 scale.

JR

Member of the Rabble and Pyromania Consultant
SMF Supporter
Joined
May 26, 2015
Messages
17,443
Points
113
Location
lincs
First Name
John
Wow is all I can say Dude 2!!! I can see you are feeling better, but I have to ask you a question. The flashing is fantastic and important to a roof, now does it really rain in the cave??? Don't you think the gutters will do their job??? I think they will...Great scratchy Brother!!!

Prost
Allen
Dude 1, absolutely no rain in the cave . Very snug . Sunny tomorrow, so in the garden as Friday and most of next week we have RAIN . Don't blame if you get it as well .:upside:

Looking better with every new iteration - lovely work John!
Steve
:thumb2:Thanks Steve.


Oh my word John, that looks fantastic!
Andy appreciated.

You know John, for a retired chippie you're pretty good at roofing and bricking!
Pete
:smiling2::smiling2::smiling2:.
 

Mini Me

SMF Supporter
Joined
Jun 1, 2018
Messages
10,164
Points
113
First Name
Rick
Looks the "Nuts" JR..I concur with Richard (Wabble) 100 % :thumb2:
 
  • Like
Reactions: JR

JR

Member of the Rabble and Pyromania Consultant
SMF Supporter
Joined
May 26, 2015
Messages
17,443
Points
113
Location
lincs
First Name
John
My god it looks real!
Many thanks Neil.

That shot with the flash attached looks damn real John. The Simon T award should be coming your way soon I reckon. Your brick laying/scribing is paying dividends.

Cheers,
Wabble
Wabble very kind of you to say . I realised flashing would be needed, but suddenly finding a way to mark using the tape over the pewter was the" thing "for me .
Looks the "Nuts" JR..I concur with Richard (Wabble) 100 % :thumb2:
Thanks my friend :thumb2:

Lovely lead work John. Looks fantastic.
Cheers Tim .
 

JR

Member of the Rabble and Pyromania Consultant
SMF Supporter
Joined
May 26, 2015
Messages
17,443
Points
113
Location
lincs
First Name
John
Right having had the minor tide up of the bench I carried on with the flashing .
The second batch has been cut , and all the flashing has been treated with MR Hobby metal primer. As a side I was looking for a suitable cleaner for a brush when using this primer, but found out the brush when put back into the primer returns to a soft state from the solid one it dries as. So don't bother with any cleaner !:nerd:

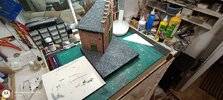
Over all view of the base and building .
IMG_20230424_182855650.jpg
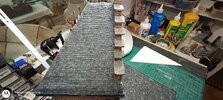
The roof, took a lot longer after finding two rows of tiles with PVA was enough at one time . Normally I would get 4 rows done in a day then the chest infection put paid to that !
IMG_20230424_182905405.jpg

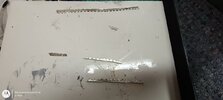
The flashing , now drying . Will paint before fixing as want to keep the brick work clean .

IMG_20230424_182910832.jpg

Tomorrow brings the PVA and primer coat ready for the tile work later .

Thanks for following.

J
 

adt70hk

I know its a bit sad but I like quickbuild kits!!!
SMF Supporter
Joined
Sep 4, 2019
Messages
9,561
Points
113
First Name
Andrew
Finished the gutting, down pipe went in ok , but the middle join came apart, any way a dap of CA seems to have done the trick.

Next was the flashing for the roof to brick. Covering a piece of Pewter with some Tamiya Tape and finding the angle of the roof I penciled in the brick spacings. Then still leaving the tape in place cut the marked parts out.
Going to have to do it in short sections, starting at the bottom and overlapping where needed. Really pleased with how it worked out using the tape on top.

View attachment 479686View attachment 479687
Flashing not fixed, but it shows the method.

Thanks for following.

John.
Simply stunning John..... So realistic.
 
Top