Pete's Sea King Mk41. Revell 1/72

stillp

SMF Supporter
Joined
Nov 17, 2016
Messages
7,220
Points
113
Location
Rugby
First Name
Pete
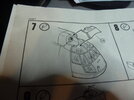
Yes, it looks as if the early Mk41s didn't have the deflector, and later they had a filter box in front of the intakes that stood up on spacers clear of the canopy, but this version seems to have the deflector actually on the canopy. This photo seems to show that Revell got it right:

seaking6.jpg but it doesn't look right! Maybe there's a spacer in there that I can't see. Some photos online seem to show the upper canopy windows shortened, which would make more sense, but would need some conversion of the Revell canopy.
Pete
 

JR

Member of the Rabble and Pyromania Consultant
SMF Supporter
Joined
May 26, 2015
Messages
17,275
Points
113
Location
lincs
First Name
John
Not being a flutter wingey thingie type I can't offer any help, but the internals you have done look good .
Hope the rest is ok Pete .
 

rickoshea52

SMF Supporter
Joined
Dec 20, 2011
Messages
3,971
Points
113
Location
North West
First Name
Rick
Yes, it looks as if the early Mk41s didn't have the deflector, and later they had a filter box in front of the intakes that stood up on spacers clear of the canopy, but this version seems to have the deflector actually on the canopy. This photo seems to show that Revell got it right:
View attachment 448984 but it doesn't look right! Maybe there's a spacer in there that I can't see. Some photos online seem to show the upper canopy windows shortened, which would make more sense, but would need some conversion of the Revell canopy.
Pete

The early Sea Kings didn’t have any intake protection. The FOD deflector was introduced sometime during the 70/80’s, I think it was a fairly straightforward bolt on modification that sat on top of the cab roof with no change to the window layout - it just partially covered them. I agree it looks to sit “flush” with the cab roof.
When the later filter box was introduced (known as EAPS/SNIPS), I believe that it simply fitted in the same position using the existing fixing holes from the FOD deflector. The filter box sits higher above the cab roof because of its mounting feet.
I don’t see why the German mk41’s should be different to the RN/RAF versions as the mod was most likely done by Westlands.
If I could find my course notes I’d take a look for you.
 

stillp

SMF Supporter
Joined
Nov 17, 2016
Messages
7,220
Points
113
Location
Rugby
First Name
Pete
Thanks again Rick. Sounds as if Revell got it right, so I think I'd better just follow the instructions!
Or I could just leave the deflector off. Decisions, decisions...
Pete
 

stillp

SMF Supporter
Joined
Nov 17, 2016
Messages
7,220
Points
113
Location
Rugby
First Name
Pete
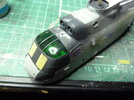
In case my rambling description didn't make sense to anyone less familiar with the Sea King than Rick, this is what was worrying me:
P1170070.JPG
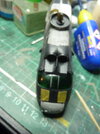
The 'splitter' in front of the intakes, and the deflector, part 29, block a big chunk of the canopy's upper windows. I assume that on the 1:1 there's a small clearance between these parts and the canopy - in fact there is on this kit as well. Sadly it's too small a clearance to remove any masking, so I've had to reduce the amount of masking.
P1170068.JPGP1170069.JPG
I suppose I could have cut the masking I'd already applied round the deflector and splitter, but I was worried about scratching the canopy, so I know have to re-mask, which of course will involve a risk of scratching the canopy... I didn't think this through did I!
The new bits of tape in those pics are there to cover the wipers.

More tomorrow if I'm allowed - we're expecting a visit from the great-granddaughter so I might be too exhausted!

Pete
 

boatman

SMF Supporter
Joined
Nov 8, 2018
Messages
12,885
Points
113
Location
NORFOLK UK
First Name
christopher
In case my rambling description didn't make sense to anyone less familiar with the Sea King than Rick, this is what was worrying me:
View attachment 449077
The 'splitter' in front of the intakes, and the deflector, part 29, block a big chunk of the canopy's upper windows. I assume that on the 1:1 there's a small clearance between these parts and the canopy - in fact there is on this kit as well. Sadly it's too small a clearance to remove any masking, so I've had to reduce the amount of masking.
View attachment 449078View attachment 449079
I suppose I could have cut the masking I'd already applied round the deflector and splitter, but I was worried about scratching the canopy, so I know have to re-mask, which of course will involve a risk of scratching the canopy... I didn't think this through did I!
The new bits of tape in those pics are there to cover the wipers.

More tomorrow if I'm allowed - we're expecting a visit from the great-granddaughter so I might be too exhausted!

Pete
Pete cant you grind a bit off the sheild bottom ?
chris b
 

rickoshea52

SMF Supporter
Joined
Dec 20, 2011
Messages
3,971
Points
113
Location
North West
First Name
Rick
Last edited by a moderator:

boatman

SMF Supporter
Joined
Nov 8, 2018
Messages
12,885
Points
113
Location
NORFOLK UK
First Name
christopher
Pete,
I’ll be adding the FOD deflector to my Airfix version after the maskol is removed from the canopy. The engineering of the Airfix kit allows for this, maybe this is an option on your Revell kit? That’s certainly what I would consider.

You can see how I masked my model in this thread - https://www.scale-models.co.uk/threads/rick’s-airfix-sea-king-hc4-1-72-operation-mikado-falklands-war.38941/
HI Rick well i clicked the link an all i can see is S M S how do i see your seaking build ?
chris b
 

boatman

SMF Supporter
Joined
Nov 8, 2018
Messages
12,885
Points
113
Location
NORFOLK UK
First Name
christopher
Pete,
I’ll be adding the FOD deflector to my Airfix version after the maskol is removed from the canopy. The engineering of the Airfix kit allows for this, maybe this is an option on your Revell kit? That’s certainly what I would consider.

You can see how I masked my model in this thread - https://www.scale-models.co.uk/threads/rick’s-airfix-sea-king-hc4-1-72-operation-mikado-falklands-war.38941/
WELL Rick all cans see is Scale Model Shop
 

rickoshea52

SMF Supporter
Joined
Dec 20, 2011
Messages
3,971
Points
113
Location
North West
First Name
Rick
HI Rick well i clicked the link an all i can see is S M S how do i see your seaking build ?
chris b

Try the search function using mikado as the key word. Or cut and paste the link into your Internet address bar - this worked for me.
 

boatman

SMF Supporter
Joined
Nov 8, 2018
Messages
12,885
Points
113
Location
NORFOLK UK
First Name
christopher
Try the search function using mikado as the key word. Or cut and paste the link into your Internet address bar - this worked for me.
THANKS Rick but its a bit to complex for me so i will wait till you come home so you can post the build if poss ?
chris b
 

rickoshea52

SMF Supporter
Joined
Dec 20, 2011
Messages
3,971
Points
113
Location
North West
First Name
Rick

stillp

SMF Supporter
Joined
Nov 17, 2016
Messages
7,220
Points
113
Location
Rugby
First Name
Pete
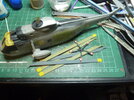
Been really busy with family stuff recently so I haven't posted much, but that doesn't mean I haven't been doing anything on the Sea King:
P1170080.JPG
Front legs are on and the twirly bits have been painted - mostly, the rotor heads need assembling. There are a lot more sticky-out bits to add (I just counted - 35!), but I think I need to get the main body painted first. Off to a reasonably local hobby shop tomorrow to stock up on Hobby Color paint, hopefully.
I'm doing the scheme on the box art, sort of camo in various shades of grey, except for the bright orange part.
Cheers
Pete
 

stillp

SMF Supporter
Joined
Nov 17, 2016
Messages
7,220
Points
113
Location
Rugby
First Name
Pete
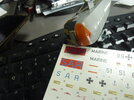
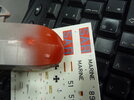
A slight setback. There are two areas on the model where "SAR" is displayed on an orange/red background. Decals are provided for these, the one on the nose being separate letter, with no background, but the ones on the sides have an orange/red background, so the nose needs to be painted in a colour that matches that background. I looked at colour charts, and picked Aqueous Hobby Colour as it seemed a good match, and sprayed the relevant parts of the model. However, the colour is nothing like that on the colour chart, much more yellow. So, I have a dilemma - try to find a better colour match to the side SAR decals, buy the Revell paints and mix as per the instructions, or leave off the side SAR decals. Or I suppose I could just ignore the mismatch.
Any thoughts folks?
P1170081.JPG

Oh, and just to add to my woes, I've popped another window into the fuselage! Luckily it's on the sliding door, which is only temporarily glued.
Pete
 

Jack L

SMF Supporter
Joined
Jul 25, 2018
Messages
1,007
Points
113
First Name
Jack
A slight setback. There are two areas on the model where "SAR" is displayed on an orange/red background. Decals are provided for these, the one on the nose being separate letter, with no background, but the ones on the sides have an orange/red background, so the nose needs to be painted in a colour that matches that background. I looked at colour charts, and picked Aqueous Hobby Colour as it seemed a good match, and sprayed the relevant parts of the model. However, the colour is nothing like that on the colour chart, much more yellow. So, I have a dilemma - try to find a better colour match to the side SAR decals, buy the Revell paints and mix as per the instructions, or leave off the side SAR decals. Or I suppose I could just ignore the mismatch.
Any thoughts folks?
View attachment 449826

Oh, and just to add to my woes, I've popped another window into the fuselage! Luckily it's on the sliding door, which is only temporarily glued.
Pete
Could you CAREFULLY cut the lettering from the decals and apply without the orange background? Or source some letter stencils that look there or there abouts?
 

stillp

SMF Supporter
Joined
Nov 17, 2016
Messages
7,220
Points
113
Location
Rugby
First Name
Pete
Thanks Jack, I had considered that but I didn't fancy cutting out the letters. If they'd been all straight lines then perhaps, but S and R - not easy. So, I had a rummage through my paint supplies, and found that 12 drops of Vallejo Ferrari Red mixed with 2 drops of Vallejo Orange gave a pretty close match.
P1170083.JPG
Close enough for me anyway, it looks better in the flesh. Maybe another drop of orange would have been better...
Pete
 

Jakko

Way past the mad part
SMF Supporter
Joined
Apr 28, 2018
Messages
10,789
Points
113
First Name
Jakko
Very strange decision by Revell to do it like that, but you appear to have solved it well enough. It’s not exactly the same colour, but I’d say it matches as well as you can reasonably expect it to.
 

stillp

SMF Supporter
Joined
Nov 17, 2016
Messages
7,220
Points
113
Location
Rugby
First Name
Pete
Thanks Jakko. If they'd added a background to the nose decal it would've been hard to wrap around, but why they didn't use a clear background for the side decals is beyond me. There's a decent distance between the nose and the side decals so I think the colour difference won't be noticeable.
Pete
 
Top